Your Guide to Busting Summer Stains

Your Guide to Busting Summer Stains

With summer comes a lot of good things: Sunshine, great weather, and no school for the kiddos and vacation for you! It’s a great time of year, by all accounts. But some of the things it brings can be a real pain: Those sorry summer stains.

Between sliding into home base, tumbling into the grass, hiking through the mountains, biking through puddles, and other forms of summer mischief and playing, stains can quickly accumulate faster than you can keep up.

Don’t worry though – that’s what we are here for! Here are some common summer stains, and the best way to fight them with your trustworthy GE laundry appliances!

Sunscreen

It may be the toughest defence against the harmful rays of the sun, but sunscreen can wear out its welcome when it stays behind and stains garments and spaghetti straps alike. When that happens, whatever is a person to do?

First, wipe off as much of the sunscreen as you can. Rinse the garment under cold water, apply some detergent, and then run the clothing in the hottest water it can stand. And next time, apply the lotion a little less liberally!
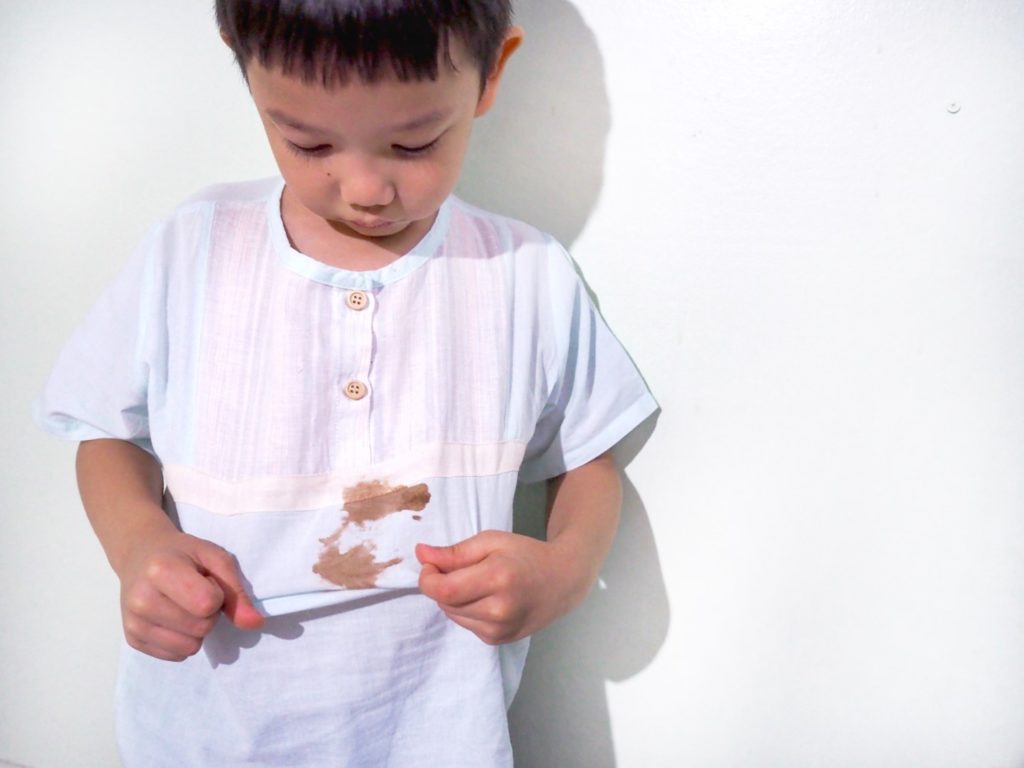
Strawberries

They may taste good, but strawberries certainly don’t look good on your white summer attire. To fight back against strawberry stains, first start by dabbing the stain with cold water. Apply a stain remover and then wash as normal.

You can also use your GE washer’s Stain Inspector cycle which comes with 40 preset stains options to tackle some of the most common stains.

How to get rid of grass stains

Grass

No matter what you do, kids are going to roll in the green, green grass of home … or the even nastier green, green grass of forests, trails, and other areas that leave nasty stains.

Be prepared! First pre-treat the stain, either with laundry detergent or vinegar. Let it soak for 30 minutes, then scrub the stain the best you can. Wash it as normal, and then rinse and repeat until the grass stain is no more! If it’s something your kids need washed fast, go for the Quick Wash on your GE washer. It will get that uniform ready to go in no time, even if you kid forgot about it until right before game time.

Sweat

If you are one of those magical, unicorn-like people who don’t sweat throughout the summer, then we’re pretty jealous! But if you are like the rest of us, then dealing with sweat – and the subsequent sweat stains – is just an annoying part of life. To tackle such stains, first mix together two tablespoons of vinegar with one cup water, then pour over the stain and let it soak. Use cold water to wash it: Heat is only going to make the stain set.

To make extra sure the stain is gone, mix together ½ cup baking soda with a tablespoon of salt and hydrogen peroxide and apply that to the stain before washing again.

Stains and summer seem to just go hand in hand, and the best thing you can do is to be prepared to tackle them as they come! Of course, the better your washer, the easier stains will be to take care of.

If your washer just isn’t up to snuff, give us a call or stop by today! One of our appliance experts will be happy to help you find a washer that will wash away all of your summer stain blues!

Amanda, Your Appliance Expert

Tips on What to Do When Your Allergies Start Acting Up in Bed

Tips on What to Do When Your Allergies Start Acting Up in Bed

Many people suffer year-round from watery eyes, sinus pressure, and nasal congestion. Maybe you are new to the allergy-suffering world. Maybe you are looking for the best medicine for allergies and have yet to find relief. Whatever the reason, here are some tips to help you limit your exposure to the top offenders while trying to get a good night’s rest on your Sealy mattress.

  1. To prevent dust mites, cover the floor with washable throw rugs instead of carpets, which, like blankets, down comforters, and curtains, are favourite mite habitats. Wash rugs, bed linens, and curtains in hot water to kill mites. Dust often with a damp cloth.
  2. If you’re allergic to dog and cat dander be sure to vacuum couches or chairs, they’ve used and try to keep them off your Sealy mattress. Or if you’re not a pet owner, but have friends with pets, still vacuum. Your friends’ clothes may carry their furry friends’ dander, which can be deposited in your home and aggravate symptoms.
  3. Indoor mould develops in moist areas. Get a dehumidifier to dry out your basement, and use exhaust fans in other areas prone to dampness and mould, such as the kitchen and bathroom. Wash bath mats often, and keep houseplants to a minimum.
  4. Consider the fabrics on the clothes you purchase. Switch out synthetic materials for natural ones like cotton — your nose and eyes will thank you. When synthetic fabrics rub against one another, they create an electrical charge that attracts pollen, which is also electrically charged. Natural fibres such as cotton also breathe better, so they stay drier and are less hospitable to moisture-loving mould. The same goes for your mattress cover, bed sheets and blankets. A clean Sealy mattress is a happy Sealy.
  5. Don’t forget to shower often to keep allergy invasions at bay. While you’re outside, pollen and mould spores can parachute onto your hair, eyebrows, eyelashes, and skin. To give them the boot and minimize your exposure wash your hands, rinse your eyes, and shower before bed, or right away if you’ve done yard work. The same goes for your pet: Even if you’re not allergic to your pup, he can become an allergy magnet after running around outdoors. Brush off his fur before you give him free rein of the house again.
  6. OTC medications like antihistamines and decongestants can significantly relieve symptoms, but if your nose is still running, it may be time for an upgrade. Ask your doctor about a steroid nasal spray, which relieves these symptoms better than an antihistamine.
  7. If pollen, ragweed, or dust mites are your main problem, think about getting allergy shots (immunotherapy). Injections of very small, safe amounts what you’re allergic to will help your immune system become resistant to the allergens, so your body doesn’t launch a full-out attack every time you inhale a pollen particle.
  8. Lastly, before bed, enjoy a cup of green tea. Japanese researchers found that EGCG, the abundant antioxidant compound in green tea, may help stop your body from mounting an immune response to a wide range of allergens, including pollen, pet dander, and dust. Steeping two or three cups a day of green tea helps bolster the body’s defences.

Thinking about changing up your mattress to help the fight against allergies? Stop by our store to see (and try out) our wide selection of products! You’ll be saying bless you … to Sealy mattresses.

Shop our Sealy mattresses right now!

Angela, Your Sleep Expert

5 Ways to Check Your Mattress for Bed Bugs

5 Ways to Check Your Mattress for Bed Bugs

Your house is your sanctuary, but it doesn’t stop creepy crawlies from entering it. It’s easy handling ants, a few daddy long legs, and even the occasional flies now and again – but when a bed bug appears, it’s time to act quick! A single fertile female bed bug can lay around 2-5 eggs each day – making this an extreme problem if not dealt with. Guard your Concept Zzz mattress and prevent an infestation.

Here are a few ways to check for beds bugs in your mattress.

Step 1: Examine the Linens With a Flashlight

Take off all your bed’s blankets and sheets except for your fitted sheet that surrounds your Concept Zzz mattress. Now’s the time to put on the latex gloves and get down to business. Grab a flashlight and start looking for bed bug excrement or bloodstain smudges. We know it’s gross, but things are going to get a lot worse if you don’t find out if your bed’s swarming with insects.

Step 2: Take Off the Other Linens

If you didn’t find any messes from the bed bugs on your sheet, move on to the mattress cover and do the same thing. Again, if there is nothing that you’ve found that’s even remotely bug-like, move on to the bare mattress. With your flashlight, continue the search for excrement, bloodstains, pieces of skin, and even eggs. Don’t forget to look in the seams of the mattress! This tends to be common place live ones will hide. It’s an awful job to do, but just remember, the sooner you do this, the sooner your mattress can be rid of any pesky pests.

Step 3: Don’t Miss the Tags!

There are a lot of details on a mattress that you don’t even realize are there and it’s important that you check each and every one of them during this process. Make sure to check the tags, any straps, buttons, zippers, and any other detail your mattress has. The more diligent you are, the better your results.

Step 4: Flip It

When we said check every detail, we meant EVERY detail. That includes flipping your mattress over and inspecting the other side of it. This is a chance to also watch for frightened bugs making an escape for it. While your mattress is in the air, take a moment to also look at your bed frame to see if there are any tiny bugs in that area as well.

Step 5: Push Away From the Wall

Another place bed bugs like to go is against the wall, behind your bed. Push the frame and bed away from the wall and shine the light against the wall to check for more frightened bed bugs running away. If there are none in sight, give the wall a little inspection. You know the drill – check for excrement and bloodstains.

Step 6: Check Under the Bed

This is the last, and arguably the ickiest part. You’ll need to get on the ground to get close enough to check for bed bugs underneath the bed frame. They have an innate sense to go towards dark places, so this could be your jackpot. They could even be hiding in screw holes!

Nobody wants to check for bed bugs in the place where they sleep. But if you happen to think there’s a chance you have bed bugs in your Concept Zzz mattress, you’ll want to go through these steps. If you do end up by finding some unwanted travellers living in your bed, be sure to get in touch with a pest control service immediately!

Angela, Your Sleep Expert

5 Reasons You Should Make Your Bed Every Morning

5 Reasons You Should Make Your Bed Every Morning

Wake up, sleepy head. The sun’s about to come up, you’ve snoozed your alarm four times already, and someone needs to make the kids’ breakfasts and lunches before they grab the bus and run off to school. That’s a lot to do in the morning, but don’t forget another important task: Be sure to make the bed.

Yes, it’s a pain. Yes, it’s something that none of us want to deal with, especially first thing in the morning when everyone is running around and there are other things that tend to take precedence.

But there are a lot of reasons why making your bed should make its way to the top of your morning routine to-do list, even if you are crunched for time. So, here are some good things that will come your way if you make some time to make your bed every morning.

Produce Productivity

If we told you that you could inject a powerful potion of productivity right into your veins every morning, wouldn’t you do it? There would probably be a line down the block of people waiting to sign right up and try a magical elixir of productivity.

Well, there’s no secret or magic here. According to Charles Duhigg in “The Power of Habit,” making your bed is correlated with better productivity.

So, put down those Monster Energy drinks and that third cup of morning espresso and try making your bed instead.

5 Reasons You Should Make Your Bed Every Morning (3)

Less Active Allergies

Allergies can be a pain, and nobody wants their bed to become a hot spot of allergy aggravation.

But, if you make your bed and securely cover up your sheets (and mattress), allergens won’t be able to enter the neatly made fortress of sheets, blankets, and pillows. Your bed will be piled up like Fort Knox, with all the annoying allergies stuck outside, unable to cross the moat or drawbridge and make it into your royal sleep kingdom.

Oh well. Nobody has sympathy for allergens, anyways. Good riddance.

It Might Actually Improve Your Sleep

According to a National Sleep Foundation poll, people who made their beds also said that they got better sleep. And honestly, how long does making your bed take, 30 seconds? It’s worth those 30 seconds for some better sleep, isn’t it? Of course it is.

You Won’t Have to Do It Later

Get it out of the way. Rip that bandage off. Nobody wants to make their bed when they come home from a long day of work, especially if they are only a few more hours away from jumping in it and messing it up again.

Instead, make your bed early in the morning and immediately cross it off your mental to-do list. You won’t have to worry about it later, and you’ll come home to a bed that’s already nice and neat.

5 Reasons You Should Make Your Bed Every Morning (2)

You’ll Feel Better About Yourself

Isn’t a messy bed a sad bed? We certainly think so, and there’s just something unfinished and lonely looking about a bed with sheets all askew and not made. But, if you take those few moments to make your bed, you’ll feel a sense of pride – and accomplishment – that you actually made your bed in the morning. It starts your day off, literally, on the right side of the bed.

As for waiting to make it until your partner wakes up, or just wrapping them inside a bed burrito while they are still asleep, that part is entirely up to you. There’s no science on either side of that issue.

Thinking about changing up your mattress to match the unbeatable comfort of a freshly made bed? Stop by our store to see (and try out) our wide selection of Beautyrest mattresses!

Angela, Your Sleep Expert

How to Decide Between Countertop and Over-the-Range Whirlpool Microwaves

How to Decide Between Countertop and Over-the-Range Whirlpool Microwaves

The microwave: It’s where we go to whip up popcorn for a family movie night, or to heat up leftovers on busy weekdays, or make hot chocolate on a rainy afternoon. When simplicity is your goal, your microwave is always there for you — so make sure you’re picking out the right one!

Countertop and over-the-range (OTR) microwaves are the two most common types you’ll find when you start shopping — but what are the pros and cons of each, and how do you pick between them? To choose that perfect Whirlpool microwave for your kitchen, you’ll want to take a few things into consideration.

Kitchen Size

If you have an especially small kitchen, this question is a no-brainer. Countertop microwaves eat up valuable surface space that could be used for food prep, storage, or even decorations. Over-the-range microwaves are installed under your cabinetry, up off the countertop. In a small kitchen, you’ll want to save every inch of counter space you can and opt for an over-the-range microwave.

Venting Power

One of the biggest benefits of a Whirlpool over-the-range microwave is that it also doubles as a range hood, essentially functioning as two appliances in one. This is the perfect solution for the average home cook, but for people who do professional cooking in their home kitchens, an over-the-range microwave might not cut it.

Over-the-range microwaves are great at siphoning out small amounts of steam, heat, smoke, or oil from your cooking surface, but it’s not nearly as powerful or quiet as a dedicated vent hood. The average over-the-range microwave vents air at a rate of around 300 CFM (cubic feet per minute), while dedicated range hoods can reach rates above 450 CFM.

Over-the-range Whirlpool microwave

An OTR is designed to either vent outside or recirculate clean air back into the kitchen. The installation instructions are very clear and easy to follow. The installation is fairly straight forward, but you will find that two people are needed for the actual installation…lifting the OTR into place.

If you plan to frequently cook large quantities of food, you may want to opt for a countertop microwave and leave the ventilation to an appliance designed just for the job.

To learn more about kitchen ventilation, read this Updraft Vs. Downdraft Kitchen Ventilation Explained

Microwave Height

One drawback of over-the-range microwaves is that getting food in and out isn’t always practical. Kids and shorter adults may have trouble reaching them, and can even run the risk of spilling their hot food. Countertop microwaves have the benefit of being easily accessible for just about everyone.

On the other hand, some people may prefer not to have to hunch or lean over when getting food in and out of the microwave. Especially if you’re taller or struggle with back pain, having an over-the-range microwave that sits comfortably at head-height may be preferable.

Countertop Whirlpool microwave

Ease of Installation

Countertop microwaves require no installation or pre-measurement of your space — all you have to do is plug them in and get cooking! Of course, you can always call our store if you want help getting a microwave installed stress-free, but if you want to start using your microwave as fast as possible, a countertop microwave is the simplest option. Countertop microwaves are also easy to take with you if you move around a lot, so once you’ve invested in that perfect microwave, you can keep it with you for a long time.

If you have any other questions about whether a Whirlpool countertop or over-the-range microwave is right for you, give us a call or stop by our store to talk to an associate. Our appliance experts are prepared to guide you through the buying process and show you all the best options of either variety. With our extensive selection, you’re sure to find an option that perfectly fits your space and your needs!

Shop Whirlpool Microwaves

Amanda, Your Appliance Expert

5 Appliance Safety Hazards to Avoid

5 Appliance Safety Hazards to Avoid

There are two types of people in this world: Those who can be left alone with power tools, and those who shouldn’t.

No matter what type of person you are though, we all could use a refresher in appliance safety. Whether you are in the market for new Samsung appliances or not, it’s always good to keep safety in mind, especially with all the things that can go wrong in a kitchen. Let’s take a look at a few safety hazards to be mindful of, and remember to put those hard hats on!

1. Fire In the Fridge!

Now, you might be wondering how in the world a fridge, which keeps things cold and frozen, can possibly be a fire hazard? Well, wonder no more because we’ve got the answers as to why the coldest place in your kitchen could end up burning in a blaze.

There are a few things you need to keep an eye on fridge-wise. First, you want to make sure to keep your fridge area clean – make sure to sweep often underneath and behind it to keep dust from building up around the fridge’s electronics.

Second, you also want to keep an eye on the fridge cord and make sure it doesn’t get frayed or leave part of the wire exposed – that’s just an electrical fire waiting to happen. For example, Robbie thought it was a smart idea to try to move the fridge on his own one day – why, nobody knows – and rolled the fridge over the cord, which damaged it. That’s a big risk for electric fires, so make sure to, as always, learn from his mistakes.

2. Sometimes Drier Is Better

We get it – sometimes you are moving a mile a minute when you are cooking and working in the kitchen. These are busy times, and multitasking is a great way to get a lot done at once, but, it’s also important to keep safety in mind. Going right from washing the dishes to plugging in the blender – hypothetically of course, not that anybody would actually do that, ROBBIE – is dangerous, and any time you are using something electric you want to make sure that your hands are dry. And no, not air dry, Robbie, actually dry.

Microwave - Safety Tips

3. Why You Shouldn’t Microwave Metal

On that “life is always busy” note, sometimes there just isn’t time in the day to cook. That’s where the handy dandy microwave comes in.

But, please please please, keep certain things out of the microwave. Like metal. That means utensils should NOT go in the microwave, even if you want to warm up your spoon before scooping ice cream. It’s really dangerous and can lead to a fire, not to mention explosions! Just don’t do it.

Action figures are also not microwave approved, for the record, Robbie. Nice try, though.

4. Close, But No Cigar

When you have a lot of small kitchen appliances it can be hard finding counter space for all of them, especially if you are constantly using all of them to put meals together. Counters always seem to be one appliance-length short of whatever you need!

There’s one thing you want to keep in mind when you are placing Samsung appliances, though. Your toaster? Yeah, the square little box that makes toast? You don’t want it anywhere near your stove or oven.

Why? Well, even though toasters get hot on the inside, if they are too close to over sources of heat, they can get damaged on the outside. Only you can prevent forest…we mean, kitchen fires.

5. Plug ‘N’ Play

When it comes to appliances and outlets, one can never be too careful. There are a lot of things you should keep in mind – such as making sure your outlets are grounded and that you aren’t using extension cords to plug appliances into the wall. Appliances are powerful things, and should be treated as such!

Well, we don’t know about you, but we feel a lot better now that we’ve refreshed on some basic appliance safety tips. Of course, you can’t have appliance tips to remember without appliances themselves – and that’s another thing we can help with! We’ve been providing families in this area with top quality Samsung appliances for years, and that’s what we love to do!

Amanda, Your Appliance Expert

The Right Way to Load a Bosch Dishwasher

The Right Way to Load a Bosch Dishwasher

With three racks — including a middle rack that adjusts to 9 different racks — the Bosch dishwasher takes capacity and loading to new heights, while also being the quietest dishwasher brand in Canada.

Although dishwashers are meant to make our lives easier, the way you load your dishes can be the difference between perfectly clean dishes, or dishes with pieces of food still clinging on for dear life.

Check out these tips to maximize your Bosch dishwasher, and get perfectly cleaned dishes every single cycle.

1. Load the Bottom Rack

Use the bottom rack to load heavy items like pots and pans, mixing bowls, and large plates. Never overlap or nest items — instead place dishes so that the most soiled areas face the spray arms. Organize larger items like platters and baking sheets toward the sides of the dishwasher, where they won’t block detergent and/or water from reaching the rest of the dishes. Also, make sure the baking sheets do not block any vents.

Next, load flatware or utensils to the bottom rack. Place knives face down – for safety’s sake! — and separate spoons and forks from one another so they don’t nest.

2. Load the Middle Rack

Next, load smaller items like glasses and mugs on the middle rack. When it comes to wine glasses and coffee mugs, place them face down at an angle to help prevent water from collecting inside. Some Bosch dishwashers come with a third rack to load more items, but if you only have two racks, lay longer utensils flat across the bottom rack so that they will not fall and get caught in the spray arms.

3. Load Top Rack

The newest Bosch dishwashers feature a third MyWay™ rack, which has the largest loading capacity of any third rack on the market. The standard Bosch third rack is also good for loading silverware, large utensils, measuring cups, cereal bowls, and coffee mugs. For best results, load larger items on the top rack so they are thoroughly cleaned.

4. Soap and Settings

After successfully loading your Bosch Dishwasher, add soap and select the setting of your choice. Use a manufacturer recommended dish soap, as other detergents can cause build-up that will clog the system. Always be cautious on how much soap you use, too: Too much liquid soap can leave a residue on your dishes, and nobody wants to eat off slimy and soapy plates.

Next, choose the best setting for the job: Use the delicate setting for items like fine China or glassware, the heavy setting for tough jobs like pots and pans, or the extra dry setting for hard-to-dry items like glass and plastic.

Bosch dishwashers also have a setting called Speed60 — which washes and dries in one hour — a feature that’s especially convenient when preparing for an upcoming dinner party or special occasion.

And don’t forget: Always make sure there is enough room between plates and try and wait until the machine is full before you start it. Following these easy steps will allow for a more efficient clean and keep your dishes — and you — much happier.

Amanda, Your Appliance Expert

How to Choose the Perfect Range for Your Kitchen

How to Choose the Perfect Range for Your Kitchen

Choosing a new range is a big decision. It needs to fit your kitchen, both functionally and stylistically. And with any luck, you won’t buy another range for many years, so you don’t want to regret your decision.

From commercial to designer and everything in between there are a lot of looks, and a lot of cooking styles to consider when choosing a range.

So how do you know which range style is right for you?

Starting with Fuel Types

The first thing people notice about a range is the cooktop. Does it have the smooth glass finish of electric and induction or the heavy cast iron grates that come with gas.

When it comes to fuel types most people choose what they’re most comfortable cooking with, what they’re most used to. But there are other things to consider too.

Gas cooktop - range fuel types

Electric ranges are going to be the most affordable, and the least intimidating if you’re not 100% comfortable in the kitchen. Gas is going to be incredibly precise, and a Professional Style range is far and away the most popular look. Induction is the safest, the most efficient, and the most powerful – but it can also be the most expensive. It has the most redeeming feature of a gas range and It is incredibly precise as well.

Performance vs. appearance can really matter here. So be sure you do your research and get the style that works best for you.

Following with Design

As you do your research you’ll come across terms like slide-in ranges, and freestanding ranges and honestly the official classifications can be a little confusing.

Technically a slide-in range has unfinished sides, and needs to slot into a cut out in your cabinetry because the top is slightly wider than the normal 30” opening size which gives the range a built-in look. A normal freestanding range has a backsplash with the controls on the backsplash, finished sides and can sit open.

Now that we’ve got that out of the way here’s what it really means. Slide-in ranges have front controls and a more professional look. Freestanding ranges have a backsplash, where the control panels are usually mounted.

Slide-in range

There’s more. But that’s a good rule of thumb. And…the “more” is that now we have slide-in, freestanding ranges…where the range has front controls, no back splash, the sides are finished it fits into a 30” slot.

Generally, people prefer the look of slide-in ranges, and they often come with more features than their freestanding counterparts. But if you have small children, then keeping little hands away from the controls is a thing, so backsplash may be a better option.

Picking the Right Finish

When it comes to performance, there’s not a huge difference when it comes to range finishes. Stainless steel requires moderately more upkeep than traditional white or black. And trendy new looks like black stainless can offer the best of both worlds. And today’s manufacturers are now showing stainless steel ranges with finishes that are fingerprint resistant.

When it comes to the colour of your range, ultimately that’s going to come down to you. You’re going to look at it every day for more than a decade. Make sure you like it!

Considering Key Features

Digging into the functionality of your new range, you’ll come across a number of innovative features that will expand your cooking and in some cases dramatically change the look of your new appliance.

Here are just a few of the most popular options out there. But there’s plenty more where these came from.

CONVECTION

Convection ovens use a fan to circulate the hot air within the oven cavity. That circulation eliminates cold spots, preheats and cooks faster than standard ovens, all while searing in juices and cooking more evenly. True convention ranges also feature an additional element wrapped around the fan to enhance the convection cooking process.

WARMING DRAWERS

Designed to keep prepared food warm for up to three hours, warming drawers replace storage drawers in freestanding and slide-in ranges. In some models, warming drawers can also cook food at low temperatures and can even proof dough for bakers out there.

SPECIALIZED BURNERS AND ELEMENTS

Speciliazed burners in ranges

One trend we’re seeing is increasingly specialized cooktops as the professional versatility expands into the rest of the market place.

5, 6 or more burners/elements allow you to cook more items at one time. Specialized burners/elements allow you to cook with more precision; Power for increased heat, Simmer for more delicate cooking, and bridge elements for more utility. Grill and griddle tops allow you to cook directly on the cook surface, while warming elements give you a dedicated space to place food before it’s ready to serve.

There’s a lot to take in, but that’s OK. This is just the beginning. Be sure to check out our other great articles on ranges in our blog, and you’ll have your family’s perfect new range baking, broiling and cooking away in no time!

And when you’re ready to shop ranges, head over to our store to find exactly what you’re looking for.

Isabelle, your appliance expert

GE Kitchen Appliance Finishes: Brand New Looks for a Better Kitchen

GE Kitchen Appliance Finishes Brand New Looks for a Better Kitchen

GE Café Matte White Finish with Brushed Bronze Hardware

Designing the perfect kitchen isn’t easy. From countertops, to cabinets a lot goes into a kitchen design and appliances are the pieces that tie a look together.

Whether it’s traditional, contemporary, or even something heritage inspired GE, GE Profile, and GE Café appliances have premium finishes to match any kitchen. But with so many finishes to choose from, how do you make the choice that’s right for you?

Well, here are a few of GE’s industry leading options to keep in mind.

White and Black Finishes

White and black appliances have always been part of a traditional kitchen, but today white and/or black finishes are the perfect addition to any high contrast kitchen design. Easier to clean, more fingerprint resistant and less expensive than other finishes, both white and black appliances remain a popular and timeless choice.

Stainless Steel Finishes

GE Profile Stainless Steel Finish

GE Profile Stainless Steel Finish

Inspired by commercial kitchens, stainless steel appliances remain the most popular choice on the market. Its neutral tone makes it a perfect complement to a wide number of colour palettes and kitchen designs. With many commercially available stainless steel cleaners to choose from, stainless steel appliances’ high gloss finish immediately upgrades any kitchen you put them in.

SHOP GE APPLIANCES IN STAINLESS STEEL FINISH

Black Stainless Steel Finish

GE Profile Black Stainless Steel Finish

GE Profile Black Stainless Steel Finish

Available in both the GE and the GE Profile lines, Black stainless steel finishes offer a brushed metal appearance with more fingerprint resistance than traditional stainless steel. If you’re looking for a more unique high-end metallic finish then GE’s Black Stainless collection could be right for you.

SHOP GE APPLIANCES IN BLACK STAINLESS STEEL FINISH

Slate Finish

GE Slate Finish

GE Slate Finish

First introduced in 2014, GE and GE Profile Slate finishes are the perfect addition to the modern home. Specifically designed for open concept living, Slate’s neutral stone-inspired colour scheme will literally match anything, and its matte finish will hide both dirt and finger prints. Versatile, and elegant, Slate is one of GE’s most popular finishes for a reason.

SHOP GE APPLIANCES IN SLATE FINISH

New GE Café Appliance Finishes

GE Café Matte Black Finish with Brushed Hardware

GE Café Matte Black Finish with Brushed Hardware

GE’s new Café series has taken personal appliance finishes to the next level. Available in either Matte White, Matte Black, or Stainless Steel finishes with complimentary brushed copper, bronze, stainless steel or black handles and accents the new Café is perfect for people who want a premium kitchen design as distinctive as they are.

DISCOVER THE GE CAFÉ DISTINCT BY DESIGN COLLECTION

As the industry leader in appliance finishes, there are more GE options than ever before. And with so many amazing finishes available, finding your perfect kitchen has never been easier.

Isabelle, Your Appliance Expert

How to Make the Most of Your Samsung Warming Drawer

How to Make the Most of Your Samsung Warming Drawer

Most homes with a range have a warming drawer, but that news might come as a surprise to plenty of range owners. Too often, that little drawer underneath an oven gets turned into storage for spare cookie sheets and unused skillets. But that drawer has a lot more to offer than a little extra space!

If your Samsung warming drawer has been collecting dust, or you’re thinking about buying a Samsung range that has a warming drawer but aren’t quite sure how to use it, try a few of these ideas for making sure you’re using this handy appliance the right way.

Warm Up Dishware

Hot food served on a cold plate is quickly going to become a lukewarm meal. Not only will a warm plate keep your food piping hot, many dishes maintain better flavours and consistency when served on warm dishware. A warming drawer is the perfect way to keep your plates and bowls nice and toasty. You can even keep mugs in there to make your tea or coffee on chilly mornings that much cozier!

Save Missed Meals

Warming drawer to keep missed meals warm

Maybe the kids got held up at band practice and missed dinnertime, or maybe you had to put everything on hold right before serving a meal because OH NO, YOU FORGOT TO PICK UP THAT THING YOU NEED AND THE STORE CLOSES IN TEN MINUTES!

Sometimes family dinner plans just don’t go the way you hope, but that doesn’t mean you should have to settle for cold food that’s been sitting out for hours. Just place your crockpot, skillet, or serving dish in the warming drawer and your food will stay fresh and ready to eat for the rest of the evening.

Make Food Prep Easier

When you’re hosting a holiday party or a family get-together, you’re going to be whipping up food like nobody’s business. Getting the timing just right on all those dishes can be tricky – how on Earth are you supposed to make sure that your soup doesn’t get cold while the fish is in the oven? Or that your casserole doesn’t get stale while the brussels sprouts are roasting? With a warming drawer, that’s how!

Instead of struggling to finish making all your food at the exact same time or leaving dishes to get cold on the counter, you can keep your finished food nice and toasty in the warming drawer until you’re ready to serve your meal. Your guests will be impressed with your cooking skills, and you can set aside the stress of perfect timing.

Help Dough Rise

Dough rising in warming drawer

If you’re a fan of fresh-baked bread or homemade pizza, your warming drawer is a one-way ticket to the perfect dough! Instead of taking up oven or counter space to proof your dough, place it in the warming drawer with a bowl of hot water. That way, it will stay safe from contaminants or curious pets out in the open, and you can still use your oven to cook the rest of the day’s meals.

A good Samsung warming drawer can open up a world of possibilities in your home. So take out those pots and pans and put your warming drawer to work! Or if you don’t have one yet, stop into our store or give us a call to find out what options we have available. We will help you find the Samsung warming drawer that will make your life much more convenient and enjoyable.

Amanda, Your Appliance Expert

Shop our Samsung Ranges Now