How to Save Energy in Your Appliance Use

Samsung Family Hub Refrigerator with Camera

It cannot be stressed enough that you can shave a few bucks off your electricity bill by investing in efficient, Energy Star-certified appliances. A chief benefit of taking this leap is protecting the planet, so we wouldn’t wait too long! In the meantime, here are some tips everyone can adopt to save energy in our day-to-day appliance use.

Refrigerator

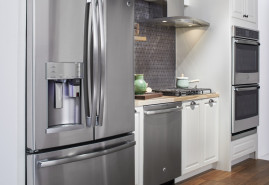
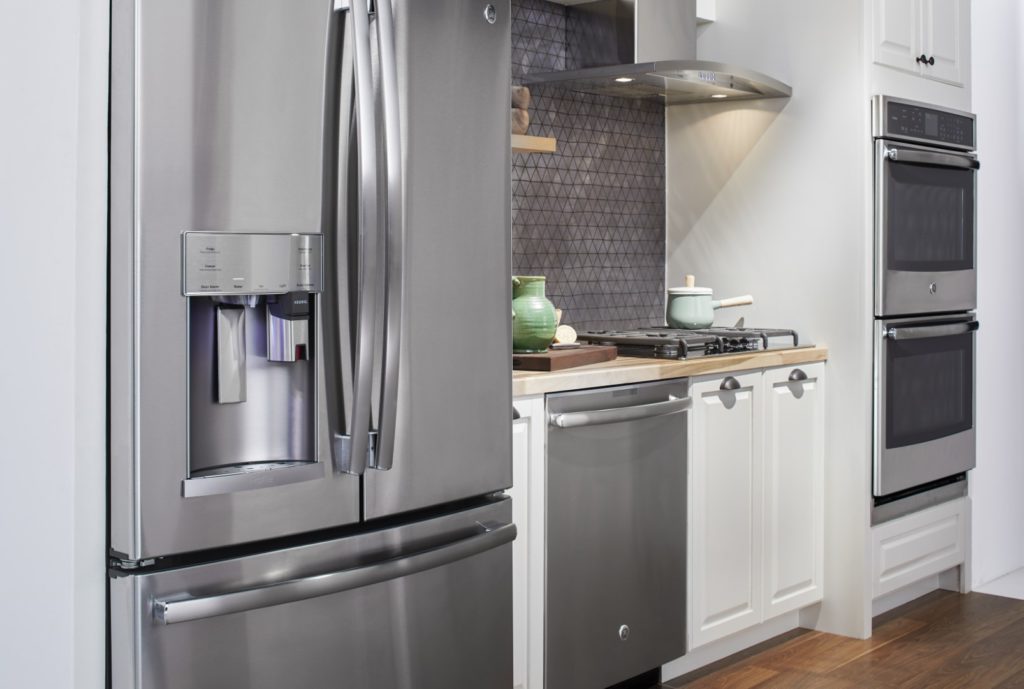
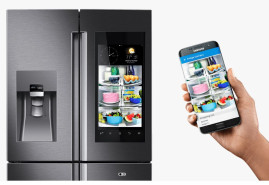
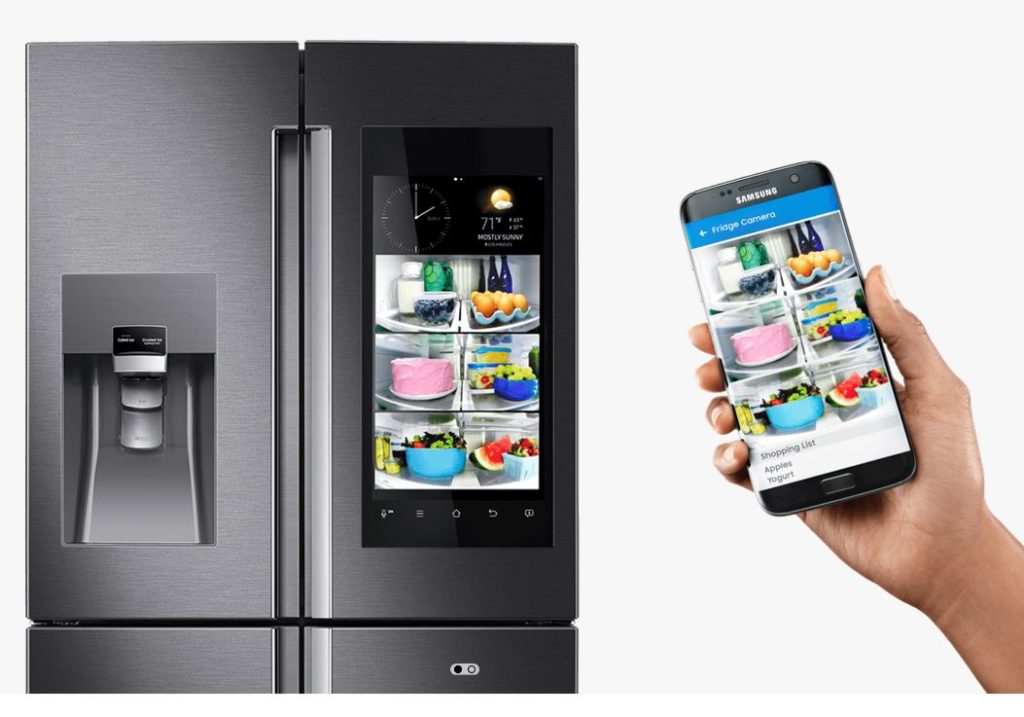
Sometimes, we have to spend a little to save a lot. This is the case when it comes to curbing energy use for most refrigerators. Since it comes down to limiting the number of times you open your fridge and freezer doors to preserve the interior temperature, we’d suggest investing in a glass-door model so that you can easily check if you need to add eggs to your shopping list.

If you’re feeling particularly generous toward the heart of your home, you might opt for a smart fridge like a Samsung Family Hub one (see image above) that comes with interior cameras from which you can have a live look at your refrigerator from your smartphone while you’re at the grocery store!
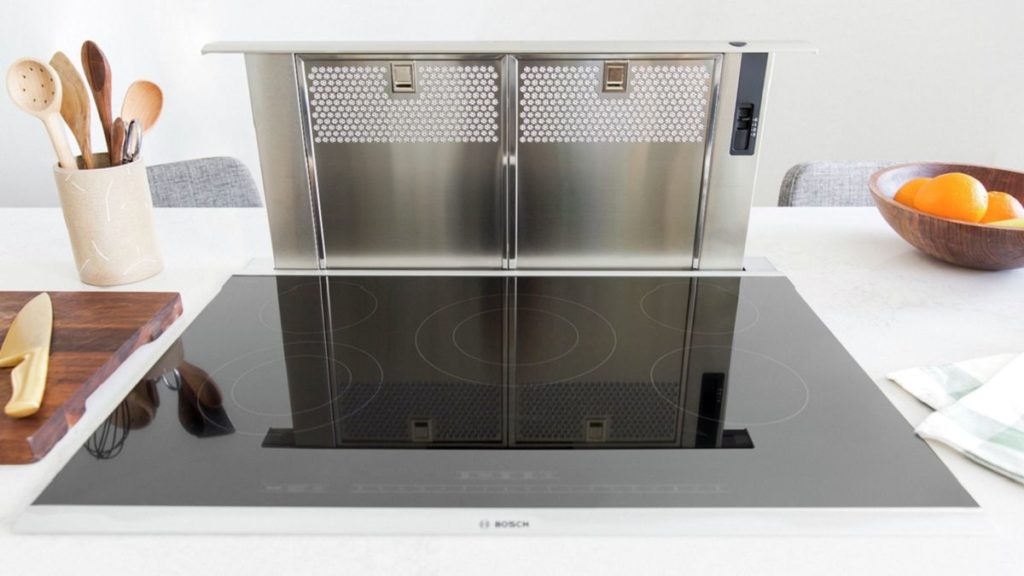
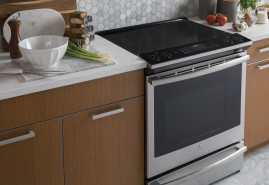
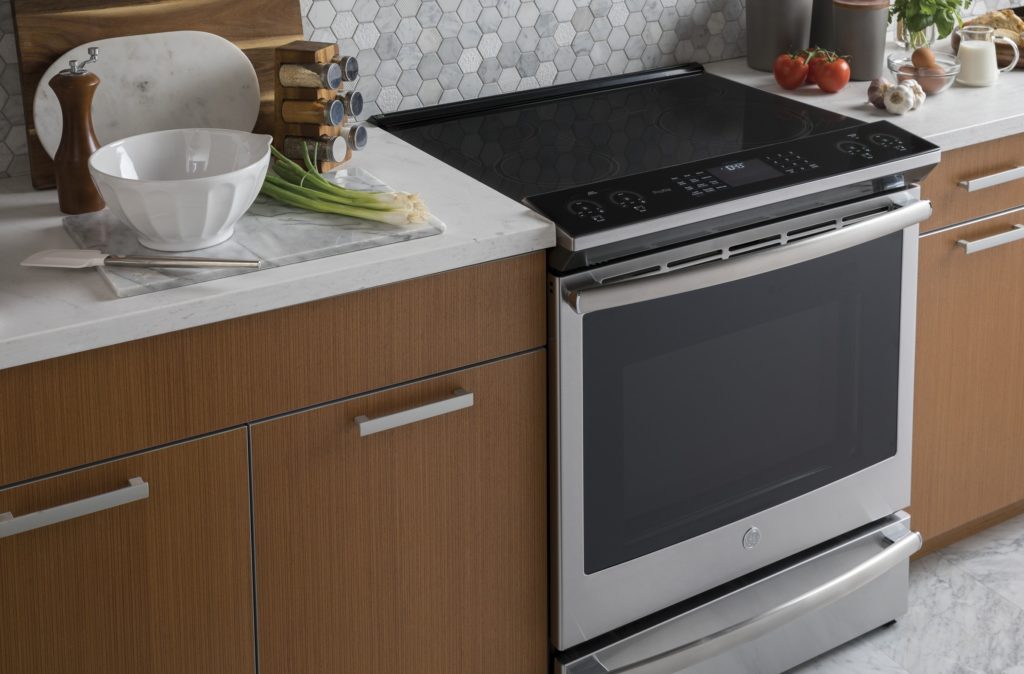
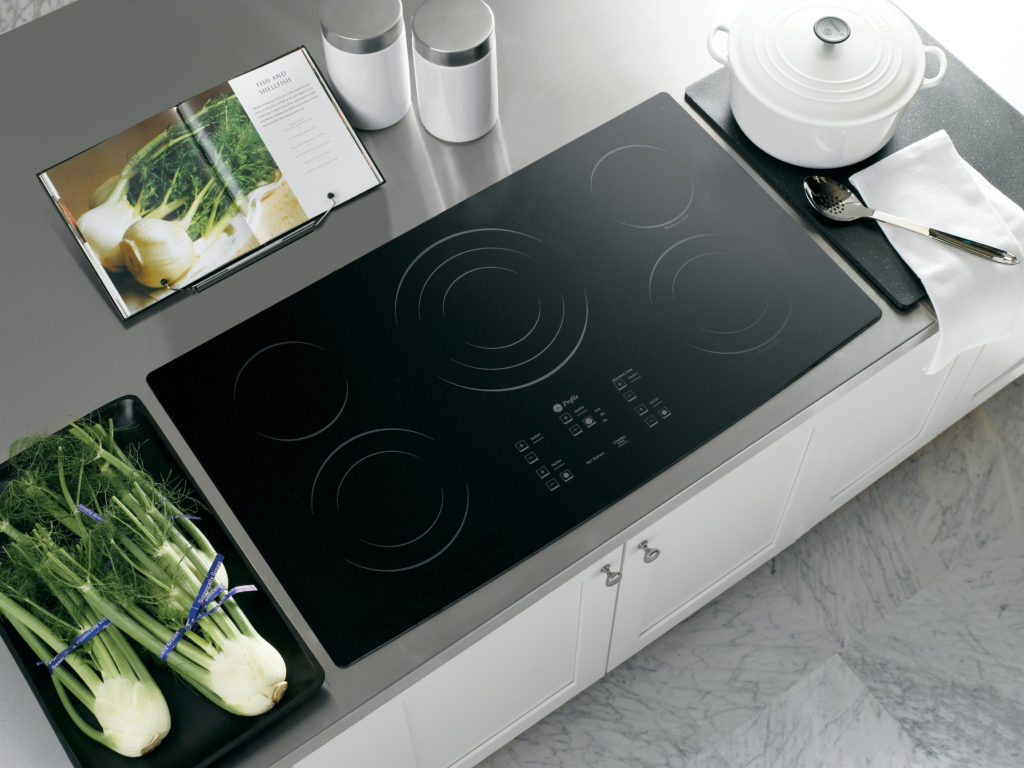
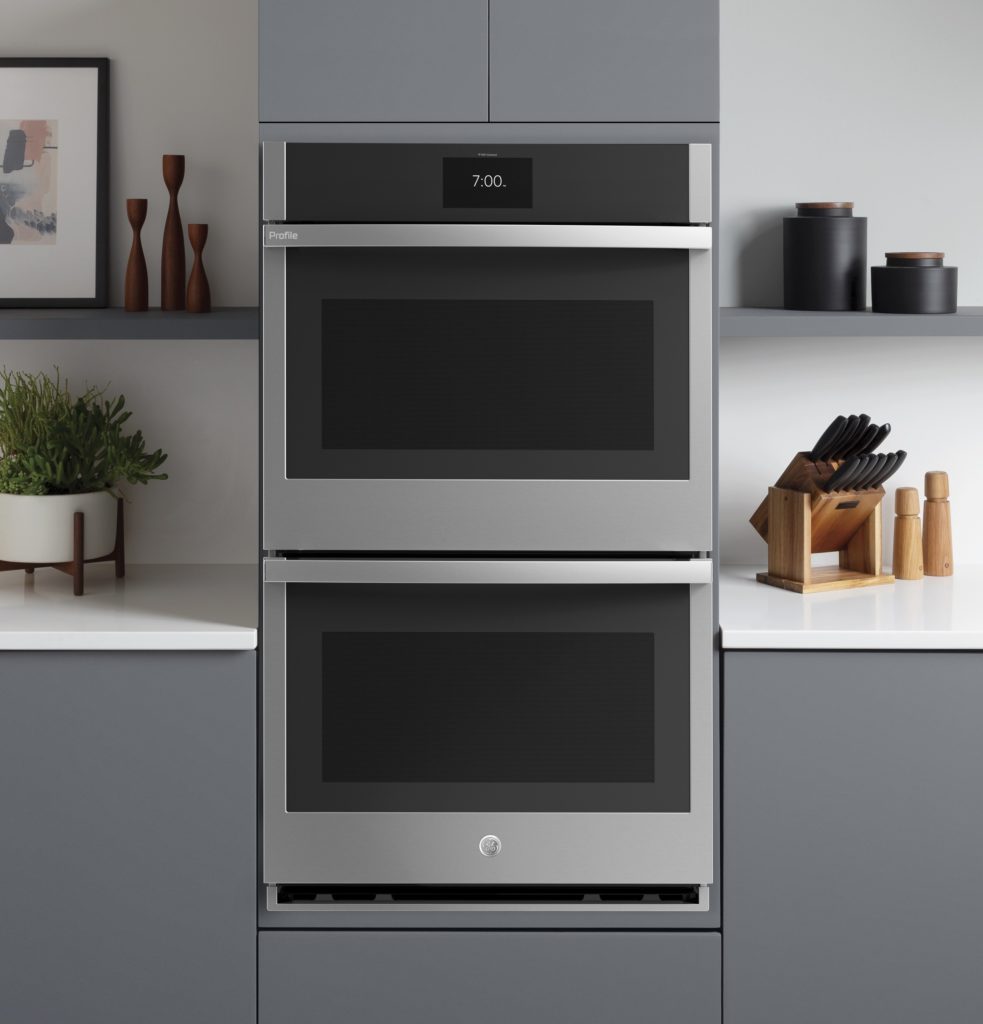
Samsung convection oven
Samsung Convection Oven

Oven Range

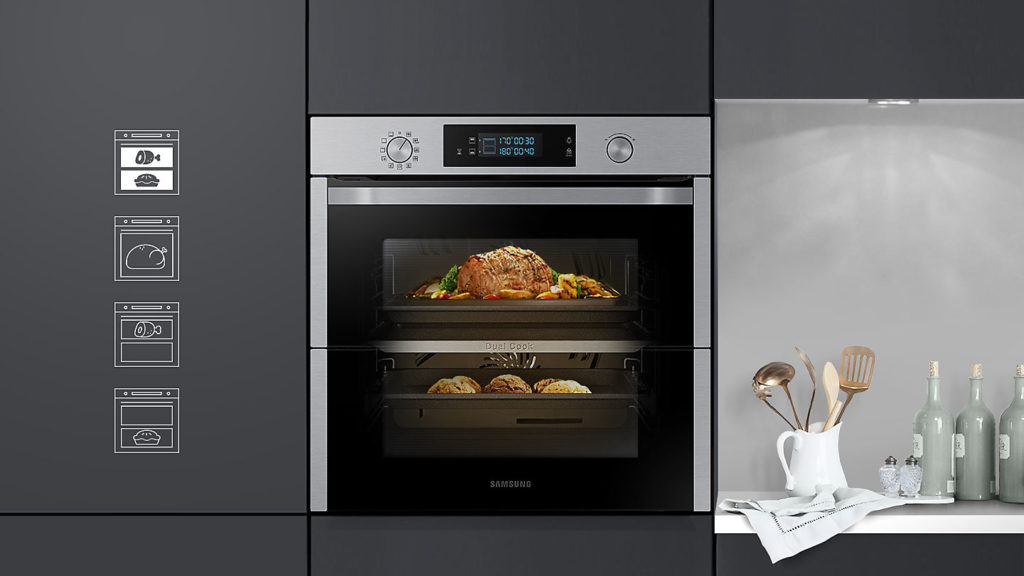
Instead of putting last night’s lasagna back in the oven or that leftover gumbo over the stove, we’d advise you to use a toaster oven or a microwave to heat up your meals. After all, these countertop appliances use less energy than conventional electric ranges.

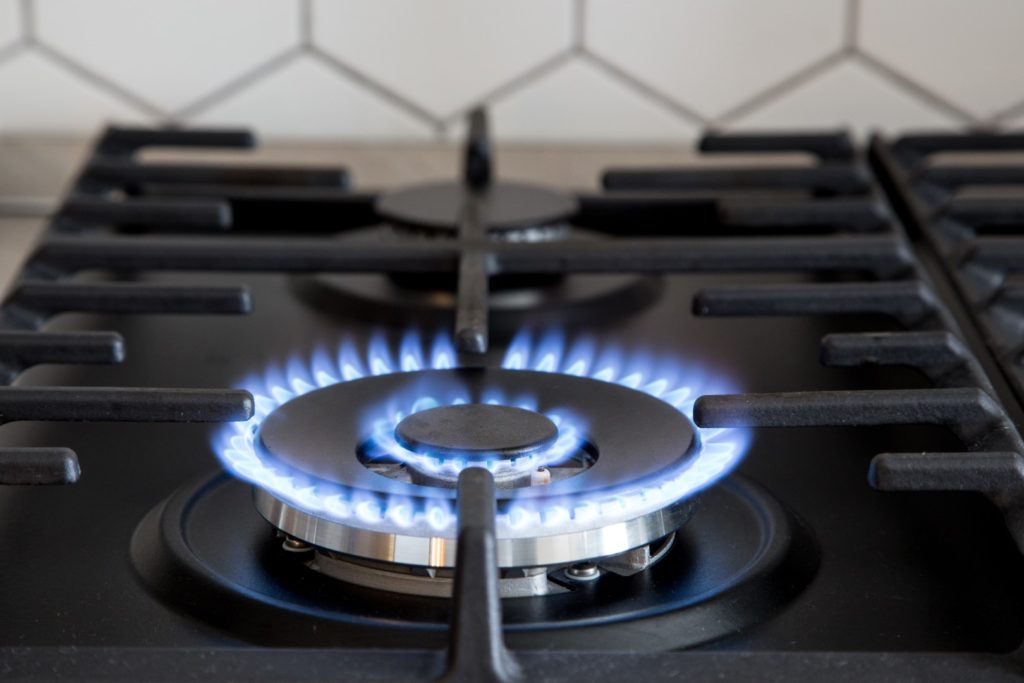
And if you’re an impatient baker, we’d like to remind you to keep the oven door closed as you’re waiting for your brownies to be done. The internal temperature can drop by as many as 25 degrees each time you open the door, so just use the oven light to get a good look at your dessert! And if you’re whipping up something delicious on your Samsung cooktop, put a lid on it and try to keep it on as much as possible.
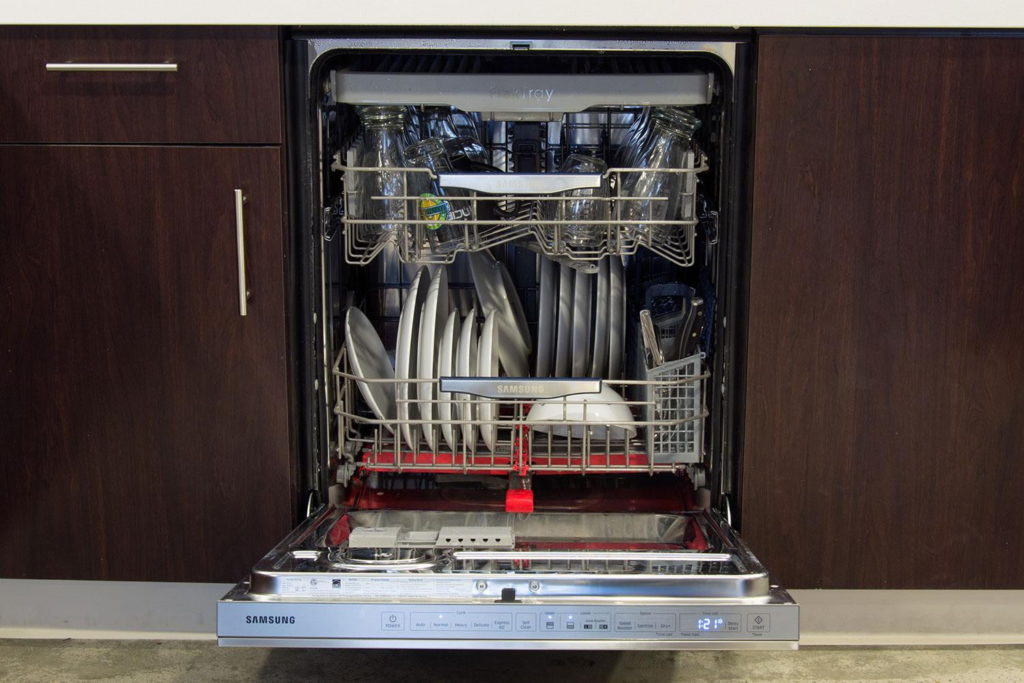
Dishwasher

Don’t dish it out if you can’t take it, so be sure to only leave the job to your dishwasher if you’ve got a full load of dinnerware to clean. Keeping with the theme of saving water, we’d also avoid using the rinse hold setting on your dishwasher, as this feature uses up to 7 times more gallons of hot water per use!

Plus, did you know that air drying your washed dishes on a rack instead of running them through your dishwasher’s drying cycle can significantly cut your appliance’s energy use?

Samsung Washer and dryer with Smart Care Feature
Samsung Washer and Dryer with Smart Care Feature

Washer

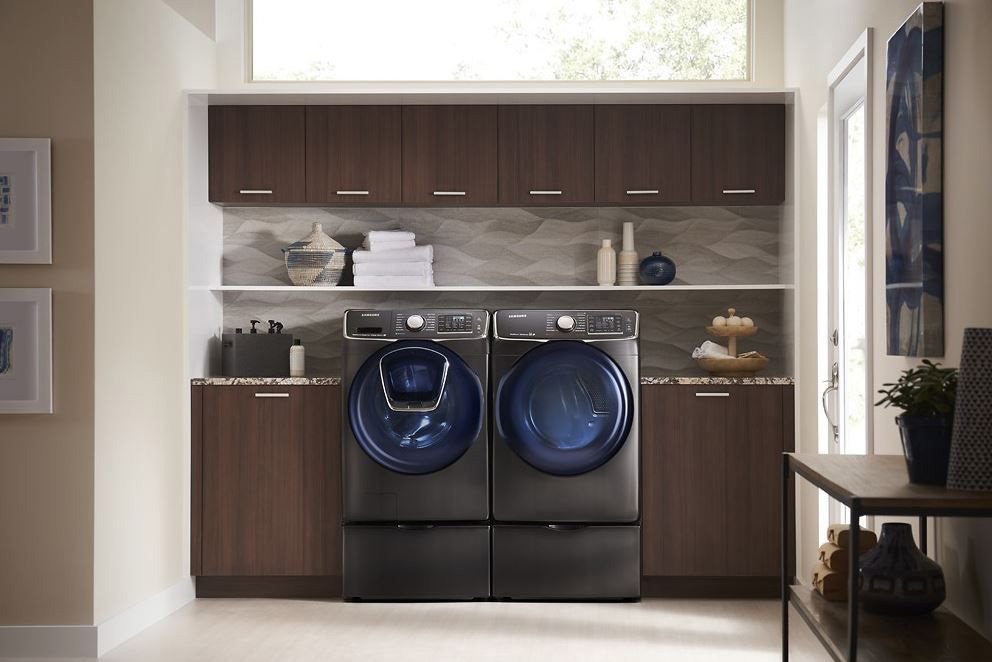
As is the case with dishwashers, wash only full loads of laundry to use up less water. In addition, we recommend washing clothes in cold water year-round, which could end up saving you around 60 dollars annually. While it is said that some laundry detergents work best in warm water, most of today’s detergents work just as well in cooler water.
As an added bonus: washing your knits in cold water is likely to cause less fraying, meaning you can enjoy your favourite sweater longer!

Dryer

We promise you these energy-saving tips won’t leave you high and dry. To prevent snags and pilling in your flannel sheets, clean your dryer’s lint filter regularly to keep your appliance running efficiently. The same goes for the tubing! Run the long nozzle of your vacuum cleaner down it to clean out pesky particles that snuck their way past the lint filter.

And of course, air dry whenever possible! While cold temperatures and sporadic showers make hanging your laundry outside a hard sell during some seasons, there are drying racks or vinyl-top tables you can use to sprawl out your damp laundry.

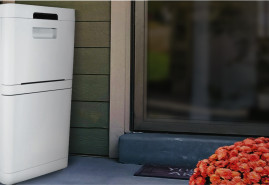
Lastly, remember to use a home energy monitor to help you understand which appliances are using the most electricity, and don’t forget to swing by our store to check out our wide array of Samsung energy-efficient appliances! Would you like more energy-saving tips? We’ve got you covered there, too.

Amanda, Your Appliance Expert

5 Delicious Meals to Make With Your Microwave

Microwave recipes

From extra work on your plate to hockey practice running late, some days, making a meal from scratch just isn’t in the cards. On days like that, your handy dandy microwave comes to the rescue!

The plastic-wrapped TV dinners of the 50s and 60s may have given microwave meals a bad rap, but these days there are plenty of ways to make healthy and delicious food using just your microwave. That’s especially true if you have one of the latest Bosch microwave models, which come bundled with convection technology for not just microwaving, but full on cooking! But even if you have a standard microwave, there are plenty of filling meals you can whip up in a snap without worrying about preheating and preparation. Here are just a few of our favourites!

1. Salmon Dinner

Salmon Dinner in mircrowave

Who says you can only make simple dishes in the microwave? Sometimes a single small entrée isn’t enough to conquer your hunger after a long day — but just because you’re short on time doesn’t mean you have to leave home to dine! This delicious salmon dish is case in point. It’s tasty, classy, something you wouldn’t be ashamed to serve on a first date, and all it takes is a few minutes in the microwave. It even includes a side of potatoes, for an extra satisfying meal!

2. Mug Mac & Cheese

Mug Mac & Cheese

All the delicious taste of mac and cheese made even faster than the boxed stuff! You can prepare your very own homemade mac in just five minutes, with the help of your microwave and your favourite mug. Use shells, elbows, even penne if you’re feeling brave — your favourite pasta can quickly turn into a tasty and filling meal in no time at all.

3. Parmesan Herb Spaghetti Squash

Parmesan Herb Microwave-Spaghetti-Squash

Healthy, delicious, AND simple as all get out — don’t mind if we do! Spaghetti squash is the perfect easy meal, and it can be made to suit any special diet in your household! This particular recipe is already both vegetarian and gluten free, but it can even be made vegan by swapping out the parmesan with cashew-based cheese flavouring. However, you choose to prepare it, this dish is flavourful as it is quick to make, so you can enjoy a delicious meal no matter how busy you are.

4. Mug Omelette

Mug omelette

Breakfast time becoming a bummer? Make the most of your mornings with this easy mealtime solution!

Nothing beats food made in a mug for ease, simplicity, and pure kitsch, and this easy mug omelette might be the best of them all. It’s a healthy, nearly oil-free way to make your favourite breakfast that tastes lighter, fresher, and more delicious than ever. AND it’s done in all of two minutes. Two! With next to no cleanup besides rinsing off the mug you ate out of, this little dish is a winner all around.

5. Microwave Jambalaya

Microwave Jambalaya

If you like a little kick to your meals, this microwave jambalaya is just the thing! Spicy and savoury with a little bit of sweet corn, jambalaya is a tasty and satisfying dish no matter how it’s made — but the fact that this recipe is so simple is certainly a mark in its favour! Jambalaya is a bit more time-consuming than some of the recipes we’ve featured, but it’s still a perfect option for students or people without access to a traditional stovetop and oven, who still want the comfort of a top-quality, home-cooked meal.

Your microwave is a lot more versatile than it gets credit for — so make the most of it! These delicious dishes are sure to satisfy any night of the week, and best of all, the prep time fits into even the busiest schedules. But if you want to get even more out of your mealtimes, maximize the flavour of your food, and save even more time, you might want to think about upgrading your microwave.

At our store, you can find microwaves that do everything from reheat to brown to braise. If your oven can do it, so can these microwaves! Doesn’t that sound convenient? Make your mealtimes more flexible with the help of a great microwave at a great price — all thanks to your favourite local appliance store!

Shop microwaves now!

Amanda, Your Appliance Expert

Ever Wonder What a Samsung Dishwasher Looks Like During a Cycle?

Ever Wonder What a Samsung Dishwasher Looks Like During a Cycle
Source: Bill Roberson/Digital Trends

It’s hard to believe your kitchen appliances aren’t magical wizards cooking and cleaning behind closed doors – especially when it comes to your dishwasher. These clean machines take the grossest, greasiest food explosions off your dishware, without you being able to see it happen.

Well, if you’ve been wondering just how your dishwasher cleans, disinfects, dries, and more, then we’ve got just the video for you. You’ll get to experience the world through the lens of a GoPro and see how your dishes go from disgusting to spotless in a matter of moments.

Are you now a believer in the power of the dishwasher? As you can tell, dishwashers get the job done without you having to put much work into it. When you’re running a load, avoid rinsing off your dishes first, period. Just set all the plates, silverware, cups, and more inside, and let your dishwasher handle the rest. You’ll never have to wonder if it’s working or not again! But, if your current dishwasher isn’t cleaning your dishes well, drop in to our store to get a Samsung dishwasher that can powerfully scrub your dishes like the one in the video!

And while it may look like your dishwasher is using too much water, don’t be fooled! Washing dishes by hand is actually more wasteful than washing your dishes in the dishwasher. On average, cleaning your dishes in the sink uses up to 27 gallons of water per load while dishwashers, and Energy Star certified ones use a lot less.

Now that you know how thoroughly dishwashers clean dishes behind closed doors, why would you ever spend another moment washing them by hand, wasting water and your time? Stop the madness by visiting us today and you’ll get to check out our large selection of Samsung appliances and many other name brand dishwashers. If you need help deciding, we’ll be here to guide you through your dishwasher buying journey, making sure you know everything about your new and not-so-mysterious-anymore appliance.

Shop Samsung Dishwashers Now

Amanda, your Appliance Expert

How to Remove Scratches From Stainless Steel

How to Remove Scratches From Stainless Steel

Warning:
*Before attempting to repair your stainless steel appliance yourself, consult your local store or a stainless steel restoration specialist.
**Make sure your appliance is made of stainless steel (a magnet should not stick to it).
***At no time is BrandSource responsible for any damage you may cause to your appliance by following these instructions.


Stainless steel is favoured for its sleek look and durability. It’s an excellent choice for cookware, kitchen appliances, sinks, fixtures, and other items around the house and workplace. Unfortunately, whether it’s a microwave, dishwasher or refrigerator, stainless steel can become scratched.

You don’t have to live with scuffed up steel forever, though! Follow these simple steps to remove scratches or scrapes on your stainless-steel appliances. One thing to keep in mind: Be sure to only apply these techniques on stainless steel that does not have a clear protective coat or synthetic surface applied.

Fine Scratches

To remove fine scratches, cleaners such as Comet, Revere Stainless Steel, and Copper Cleaner can be used to gently buff stainless steel. If you can’t find any of those, appliance manufacturers often make their own cleaners that are easy to find at home improvement stores. Minor scratches can also be concealed with the use of a stainless-steel polish. Unfortunately, you must reapply the polish on a frequent basis to keep your products looking great, but this may be the best method for appliances covered with protective film.

Deep Scratches

Deeper scratches, meet your match: Sandpaper. A piece of wet fine-grit sandpaper can be used to remove deeper scratches. Make sure to always keep it wet, and follow up with a rubbing compound.

Start with the scratch and then blend it in. Determine the direction of the grain and start sanding in one direction only, following the brushed pattern. Don’t sand back and forth and NEVER sand against the grain. If you need to use a courser-grit paper to remove deeper scratches, follow up with a finer grit, and then finally a rubbing compound.

The sanding technique only works on plain (uncoated) stainless steel panels: Don’t try it on simulated stainless steel or stainless panels with a fingerprint-resistant clear coat.

Clean and Polish

After removing scratches and unwanted marks, you can then clean and polish your stainless-steel appliance. With a clean microfibre cloth, wipe down the newly sanded surface. This will remove sanding and metal dust, as well as leftover polishing compound or water. Even when you’re cleaning, it’s also important to rub and buff in the direction of the grain.

For best results, spray the surface of the metal with several sprays of vinegar, and then pull out another clean microfibre cloth to wipe the metal. The vinegar will clean the surface and remove all traces of other compounds and cleaners.

Once the stainless steel is clean and dry, start polishing. Apply a few drops of oil to a clean microfibre cloth. You can use mineral oil, vegetable oil, or even olive oil. Rub the cloth against the steel, in the direction of the grain, to polish the metal. Add more oil as necessary. Continue rubbing until the entire surface has been polished.

Stainless steel has a beautiful finish and following these steps will ensure your stainless-steel surface remains scratch free, while bringing out that brand-new shine that you fell in love with in the first place.

Amanda, Your Appliance Expert

The Best Way to Clean Your Whirlpool Oven

The Best Way to Clean Your Whirlpool Oven

We know that cleaning your appliances never sounds like a fun job, but it’s something that just must get done – especially when it comes to washing your Whirlpool oven. If you don’t wash your oven, you will begin to see a buildup of dirt, food marks, and other residues stuck all over the interior. If it’s not cleaned out, the bacteria ridden oven will likely pass on to new food every time you put something in the oven. Taking the time to clean your oven when it’s dirty will prevent issues in the future while also ensuring your oven continues to perform correctly.

Instead of grabbing an all-purpose cleaner from under your kitchen sink where all your other chemical cleaners are, we’re taking you on a natural route to disinfect your Whirlpool oven. The fewer chemicals you use, the better. Try using these simple yet effective ingredients to kick the grime out and leave the interior of your oven with sparkle.

Ingredients:

  • 1 Cup Baking Soda
  • 1/3 Cup Water
  • Vinegar
  • Essential Oil (optional)

Instructions:

Add the baking soda, water and drops of essential oil into a bowl and mix it up. Once it looks blended well, you’ll want to remove the grates from inside your Whirlpool oven. Then, have at it! Use a sponge, toothbrush, or whatever you feel comfortable with to start scrubbing the cleaning concoction throughout the oven’s interior. Be sure to get all the nooks and crannies, as well as the inside window.

A good time to start this cleaning spree would probably be at night, giving it many hours to thoroughly soak while you sleep. You can do this at any time of the day, but let your cleaning mixture soak for at least a good 8 hours to do the job efficiently.

When morning comes, put your vinegar in a small spray bottle, and spray everywhere inside your oven. Give your vinegar about 10 minutes to mix with the baking soda blend. If you don’t want your oven to smell of vinegar, put a few drops of essential oil in the vinegar spray bottle to help mask the odour. Then use your sponge and some water to wipe everything up. You may still need to scrub some tough food stains, but for the most part, everything should slide off like butter!

AquaLift Self-Clean Feature

Cleaning your oven is an easy chore, especially with this recipe from ingredients you can generally find in your kitchen cupboards. Not to mention, the results make the oven look almost new! If you don’t feel you have time to give your oven a deep cleaning, some Whirlpool ovens have the AquaLift self-cleaning feature to help you out. All it needs is 50 minutes to give you a chemical and odour-free cleaning. This is perfect for those days you’re in a hurry and just can’t spend 8 hours cleaning your wall oven.

Visit us in store to check out our Whirlpool ranges and wall ovens and discover more of their helpful features!

Amanda, Your Appliance Expert

Ventilation Hood 101: 6 Common Types of Bosch Ventilation

Ventilation Hood 101 6 Common Types of Bosch Ventilation

Class is in session! Learn how the different types of hoods improve indoor air quality.

Under Cabinet Hood

Bosch Under Cabinet Range Hood

This particular type of hood is one of the more common types of hoods on the market due to its affordability and compact size. This model is mounted beneath the cabinets that are set above the stove. It’s a simplistic, versatile design that can be incorporated into any kitchen style. They are ducted through the cabinet above or through an exterior wall, so oils and grease do not circulate throughout the kitchen.

Wall-Mount Hood

Bosch Wall Mount Ventilation (3)

The wall-mounted hood is one of the better options for preserving kitchen space. A lot of modern kitchen designs will see the hood installed over the range in place of cabinetry–serving as a distinctive design element in your kitchen. The main benefit of the wall mount is how the fan circulates air to reduce mould and bacteria build-up on countertops and other cooking areas–quickly eradicating odours and fumes.

Island Hood

Kitchen Island Bosch Ventilation

The island hood is best used for larger, professional-style ranges that are located on a kitchen island. The ceiling mount can withstand the extra elements that may come along with additional burners. This venting system can also add a very sophisticated look to your cooking space–which comes in various colours and design themes. The aerial hood helps disperse steam and grease away from your kitchen, preventing cabinet damage by way of condensation and acidic contaminants.

Downdraft Hood

Bosch Downdraft ventilation

The downdraft hoods are also common to install for kitchen islands. They are hidden inside the counter and pop up along the back of the range to reduce steam from a horizontal angle. This type of hood pulls the fumes down beneath the floor and out of the house. They are an excellent option for those who don’t want a larger overhead hood taking up space in their kitchen. This feature will help decrease mildew, peeling and discolouration on floors and walls due to moisture.

Custom Hood

Custom Hood Insert by Bosch

The custom hood is the ideal option for people who don’t want to be tied to a certain design option, and would prefer to work the ventilation into the kitchen landscape. Hood inserts and power sources are hidden into the cabinetry to allow a creative, custom-made approach. Planning how you are going to duct your ventilation is key to relieving your kitchen from smoke and smells associated with cooking–removing chemical vapours and grease build-up on walls, drapery, clothes, and carpet.

Power Pack

If you don’t care for the aesthetic of some of the common types of hoods, there is an option to go with the effortless style of a power pack. It can be easily added to existing cabinetry without having to clear out any space or alter the look of your kitchen because it has a much smaller size and connects with parts already used in the kitchen.

Size and strength are everything–make sure your dimensions are accurate before taking this customized approach.

There you have it-6 ventilation hoods perfect for any kitchen layout. If you’re not sure which model fits your cooking space best, we’re always available to answer any questions and help you find exactly what you need to fit your home.

Amanda, Your Appliance Expert

How to Choose Between a Cooktop and Wall Oven or Range from GE Profile

How to Choose Between a Cooktop and Wall Oven or Range from GE Profile

It’s the appliance dilemma of the ages: “Should I get a cooktop and wall oven pair, or a range for my kitchen?”

The question has plagued homeowners for decades, and there’s no single, simple answer. Ultimately, either option will get the job done, and if you’re getting appliances from a quality brand like GE Profile, they’ll get the job done well.

However, you’ll want to take a few things into consideration when deciding which option will work best for your space and your needs. Here are five things you should be thinking about when you’re choosing between a range or wall oven-cooktop combo from GE Profile.

1. Price

If you’re shopping on a budget, a range should probably be the first option you look at. Buying a single range will be much cheaper than buying both a cooktop and a wall oven, and the price only goes up if you opt in for all the latest features, like induction cooking and warming drawers.

With a GE Profile range, you can save some money without sacrificing quality. GE Profile offers range options from induction and electric smoothtops to gas cooktop with four burners and griddle. That’s a lot of cooking power for less!

Shop GE Profile Ranges

2. Flexibility

If it’s features you’re interested in, the cooktop/wall oven combo is unbeatable in its flexibility. Getting two separate appliances lets you mix and match, so you can find exactly the features you want without compromise. Looking for a self-cleaning oven and a cooktop with a heat indicator? GE Profile has you covered. Hoping for all the latest cooking functions plus a cooktop that heats up in a snap? No problem!

Choosing a Cooktop

GE Profile also offers gas, induction, and electric cooktops, so you can pick the cooking style that works best for you. Speak with our Appliance Experts, they will help you pick which cooktop suits all your cooking needs. By mixing and matching appliances, you can get exactly the features you want, nothing more, nothing less.

Shop GE Profile Cooktops
Shop GE Profile Wall Ovens

3. Cooking Space

With a cooktop and wall oven, your options for customizing your cooking space are endless. If you’re a big time baker but rarely have use for a cooktop, you can go all out on your oven space – double ovens, extra wide ovens, and even a warming drawer – while keeping your counter clear with a simple four-burner cooktop. Or you can go low-key on the oven and trick out your counters with a 5-burner cooktop! With a cooktop-oven combo, you can give yourself room to spread out where you need it, and save space where you don’t.

4. Kitchen Space

On the flip side, if you opt for a cooktop and wall oven combo, you’ll need to make sure you have the space to use it. GE Profile’s stand-alone ranges are easy to install, they can be placed anywhere you want, and you don’t need to do any major remodeling to add one in. A range also keeps all your cooking needs confined to a single area, for more intuitive food preparation. If you get a wall oven, you’ll need to either have or make the wall space for it, which can require some more major renovations.

Unless your kitchen is especially spacious, the effect of multiple cooking zones can feel cluttered if you’re not careful. Ranges are more compact – relying on a range for your daily cooking can simplify the whole process and make for a less chaotic kitchen.

GE Profile Wall Oven

5. Style

When deciding between a wall oven and cooktop or a range, both options are equally stylish. GE Profile ranges have a stunning, classic design with finish options that range from traditional white to elegant black stainless steel. They make for a great focal point in any kitchen and add a professional flair to your cooking space.

Cooktops and wall ovens, on the other hand, add a sleek, modern touch. Induction and electric smoothtops blend right in to the counters, and built-in ovens make for a totally integrated, high-tech kitchen. Either option can make itself right at home in your kitchen, and it’s all up to your personal tastes to decide which style is the one for you.

When you’re creating a kitchen by GE Profile, you really can’t go wrong. Whether you pick out a range, or a cooktop and wall oven combo, you’re going to be bringing home powerful appliances that get your cooking done in efficiency and style.

If you’re still having trouble deciding which appliance will work best for you, give us a call or come down to our store! We’re happy to help you pick out the perfect GE Profile appliances and decide how to make your kitchen suit your needs best!

Amanda, Your Appliance Expert

3 Easy Ways to Renovate Your New Home with Samsung Appliances

3 Easy Ways to Renovate Your New Home with Samsung Appliances

Renovating your kitchen is a big deal. It’s not always a quick job that will be completed in a day – but it’s worth it! It increases value to your home, saves you money on utilities with new and improved kitchen appliances, and overall makes your home look nicer. While it’s a time-consuming project to take on, we have a few tricks up our sleeves that can save you some money and time.

Take these 3 renovation ideas into consideration when working on your home’s new kitchen!

1. Hardware

One way to change the whole look of your kitchen is by simply replacing all the knobs and handles on your cabinets and drawers. This doesn’t take much money and can completely change the style of your kitchen. We suggest bringing along some old knobs and pulls to the hardware store to make sure you get the correct sizes.

2. Change Out the Faucet

Over time, faucets tend to get grungy and ridden with bacteria. In a way, the faucet is the focal point of the room and should look clean. Try investing in one that will tie the room together, so your kitchen will already start to look as though it has been fully replaced.

3. Install the Samsung Black Stainless Steel Collection

Matching your appliances will help your kitchen look organized and sleek – especially if those matching appliances happen to be the Samsung Black Stainless Steel Suite. The beautiful black matte finish gives the collection an easy-to-clean fingerprint resistant surface and helps the room blend together. We highly recommend including Samsung’s black stainless steel collection into your remodeling process to give your kitchen a timeless look.

But looks are only part of the battle. You want loyal, hard-working appliances in your home. Luckily, Samsung appliances have more than just a pretty face. From a sophisticated refrigerator, ready to take on your whole family, to innovative ranges made with the versatility for all your cooking needs, Samsung won’t let you down visually and functionally.

Fixing up your kitchen is no easy task, but with a few tips and a little help, you’ll be able to do it! Contact us today to find out more about Samsung Black Stainless Steel Collection and how we can help you in the process!

Amanda, Your Appliance Expert

5 Common Stove Top Problems and How to Fix Them

5 Common Stove Top Problems and How to Fix Them

Whether you use a range or a built-in cooktop, the stovetop is one of the most important appliances you own, and when it starts giving you trouble, it’s hard not to panic. Without a stovetop, how can you make your mom’s famous chili? How can you whip up your favourite pancakes in the morning or a grilled cheese when you get home late???

The prospect of a broken stovetop is anxiety-inducing, but we’re here to tell you not to panic. Most common stovetop problems can be easily fixed with a little TLC, leaving your stove top and your late-night snacks ready to go.

Here are five common problems your stovetop might face and their most common solutions.

The Problem: Electric burner won’t heat.

The Solution: If one of your electric burners won’t heat properly, test all the others. If all your burners are having trouble heating, it’s likely an electrical problem, and you’ll need to call in a professional or replace your cooktop. If just one coil is heating improperly, check the connection and make sure the coil itself is firmly plugged in to the cooktop. Try swapping out the broken coil with another one on your cooktop – if the new coil works just fine in the same spot where the broken coil was plugged in, that means it’s time for a replacement coil.

The Problem: Induction element won’t heat.

The Solution: If you’re using an induction cooktop and it just won’t heat up, be sure the pan you’re using is induction compatible. Induction works by heating up the pan directly, rather than the burner below, so you’ll need special, ferromagnetic pans for your cooktop to work properly. Here’s a breakdown of what types of pots and pans will and will not work with your cooktop.

The Problem: Gas burner won’t light.

The Solution: If the flame just won’t light on your gas cooktop, there could be a few things going wrong. First, make note of what happens when you try to light the burner. Normally, you should hear a clicking noise and be able to smell gas coming out of the valves. If you hear the click but don’t smell anything, the problem is likely with the gas flow. If you smell gas but don’t hear any clicking, the issue could lie with the ignition switch.

Turn the appliance off and unplug it if you can, then remove the grate and burner cap. Clean out any loose food debris and reconnect any wires that may have come loose. If that doesn’t solve it, you will likely need a new igniter or some work on your gas connection. Give us a call and we’ll be glad to help you find replacement parts and arrange any major repairs on your stovetop.

Gas stove top problems

The Problem: Gas burner is heating slowly.

The Solution: A slow-heating cooktop can become a major issue no matter what type of cooktop you have. If you have a gas cooktop, this issue could be due to the burner openings being clogged with debris, leaving the flames small and weak. This can be pretty easily fixed by giving your whole stove top a thorough clean.

Turn off and disconnect your cooktop, then remove the grates and burner caps and give them a good soak in the sink with some soap and hot water. Scrub the surfaces with a stiff brush. Wipe down the surface of the cooktop with a damp sponge as well, and use a toothpick to remove food or other debris from the gas valves. Baking soda and vinegar can also help your cleaning routine pack some extra punch.

The Problem: Gas stove top keeps clicking.

The Solution: Some clicking is normal when you switch on your gas stove top, but if it continues long after the burner is lit, or even prevents the burner from lighting, it can become a real inconvenience. This problem usually happens when something is blocking the burner. Check to make sure the burner cap hasn’t been knocked out of place and that there’s no debris blocking the holes. If you don’t have a sealed-burner cooktop, food can easily get stuck in the gas grates and will need to be removed using a paperclip or other slim, metal object (don’t use anything easily breakable or flammable, like toothpicks or plastic forks). If the clicking continues, there could be excess moisture trapped in the cooktop. Try toweling off the stovetop or even pointing a fan at the cooking surface to soak up some of the extra water or grease that may have spilled.

With these tips in hand, your stove top will be up and running again in no time. If your cooktop does end up needing a major fix – or if it’s time for an appliance upgrade – be sure to contact our store to make sure you get the best repair service, replacement parts, and new appliances around.

Amanda, Your Appliance Expert

6 Essential Security Devices for the Holiday Season

Danby Parcel Guard

The kids are at school, you are at work, and it’s the busiest time of the year. This means that your home may be a target for some Grinch-y activity. With potential scenarios ranging from having a shady aunt loot an heirloom while they’re over for a holiday dinner to narrowly missing a thief swindle a package from your doorstep, it looks like you need to step up your home security.

Safety on Your Own Time

The hectic nature of the holidays is why you need a security system that can alert you when you actually need alerts, not whenever it feels like it. With Control4, for example, you can receive safety push notifications, right on your Apple Watch. Safety alerts wherever you are, on your own schedule—it’s so simple yet makes such a difference.

A Door to Safety

With visions of shopping lists and errands dancing in your head, it can be easy to be unnerved about the little things, too. With ELAN Home Systems, you no longer have to worry about whether or not you locked the front door while you’re browsing the wine section at the liquor store. Using your smartphone, you can easily lock or unlock your door remotely if the kids find themselves locked out of the house. No more keys, no more worrying and especially no more sneaking in through the dog pen. It’s a win for everybody involved.

Pound the Alarm

The days of stressing over package theft, missed deliveries and weather-damaged boxes are gone. Thanks to Danby Parcel Guard, the smart mailbox you can prop on your porch, you can be assured that your Christmas presents are safe. This device is teeming with hi-tech features, including remote access to lock and unlock your mailbox via WiFi, a built-in alarm and a hidden camera. Even more impressive: once your package is placed inside the anti-theft drop slot, you’ll receive a notification that your package is secure.

Shop Danby Parcel Guard smart mailbox

Out With the Old, In With the New

Who else remembers putting timers on their lamps to make sure it looked like somebody was home all day? Making a deserted house look occupied during the holiday season can be tricky, but luckily, there’s a much smarter way of handling that now.

Some applications, like the Control4’s Mockupancy app, has you—and your safety—covered. It will alternate lights, pull your smart shades up or down and turn your TV on and off, making it look like you are home even when you aren’t.

Back, Back, Back It Up

As previously alluded, it seems like this time of year is rampant with package thieves. Recovering that brand new record player for your cousin Gladys is now possible, thanks to Luma.

Luma recorders secure local storage on hard drives that can hold months of footage. Just hook one to a covert surveillance camera, and fret not about losing that security footage when you need it.

Knock-Knock, Video’s Here

Ring Doorbell Camera

HD video isn’t just for your TV anymore—with a Nest Ring Video Doorbell Elite you can have HD video and two-way talk, meaning that no matter where you are you can check who is knock, knock, knocking on your door.

There are a lot of things to think about when the holidays come around, but the last thing you want to worry about is safety and security. To combat pesky package thieves, put your trust in a Danby Parcel Guard. Give us a call today, and we’ll be happy to walk you through the smart tech that comes with this handy mailbox.

Amanda, Your Appliance Expert