Your Complete Bedroom Spring Cleaning Checklist

Your Complete Bedroom Spring Cleaning Checklist

You know when the days get longer, and the sun shines brighter, it’s spring cleaning time! After a long cold winter, we get that instinctive urge to open windows and freshen things up. With that extra daylight, we can see what we miss in the dark of winter. We shouldn’t, however, keep it only to new comforters and sheets, but consider a full room makeover.

Here are some ceiling-to-floor simple ideas to get that fresh feel back into your bedroom.

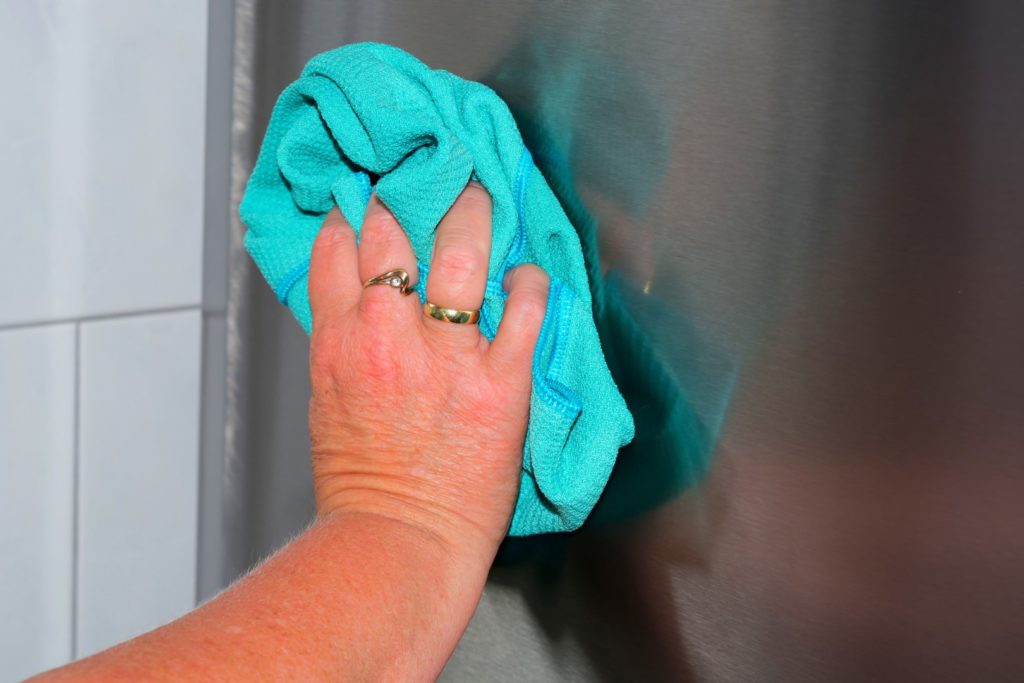
1) Wash Your Walls and Ceiling

This isn’t as difficult as it sounds. Begin by removing all the wall hangings and window dressings as well as all items from the top of your dressers. Your bed should be bare except for an old sheet to protect the mattress from falling debris.

Open all windows. Using a damp microfibre style mop with a telescopic handle, wipe the ceilings and walls. Regularly rinse out the mop in the bucket. If you suffer from allergies, add a few drops of lavender to the water as this will add an extra layer of anti-bacterial protection.

2) Dust Everything Else

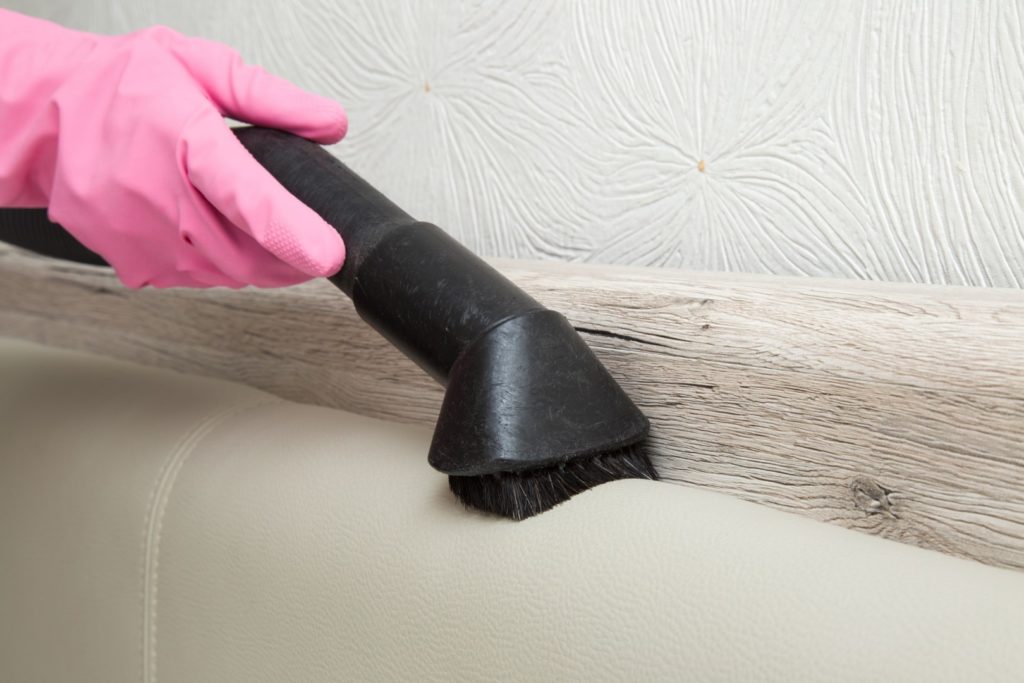
If there are any hanging lamps or ceiling fans, get to those next with a vacuum and damp cloth. Table lamp shades should be vacuumed and intricate designs cleaned with a damp cloth. Vacuum the backs of the dressers, something always missed which collects its share of dust. Rather than returning everything back to the dresser, reduce, recycle, or reuse elsewhere.

3) Paint or Not to Paint

Painting a bedroom

Your bedroom may be in dire need of more than a wipe down so if you see a paint job in your future, consider colors that are known to promote a better-quality sleep. Experts say that before you pick your colors you should consider your décor style: dark and cozy or light and airy, solids or patterns.

Experts also say that your bedroom walls should promote relaxation so light blues, greens, grays, and whites are the best. Add your unique style with a punch of color in your selected accessories.
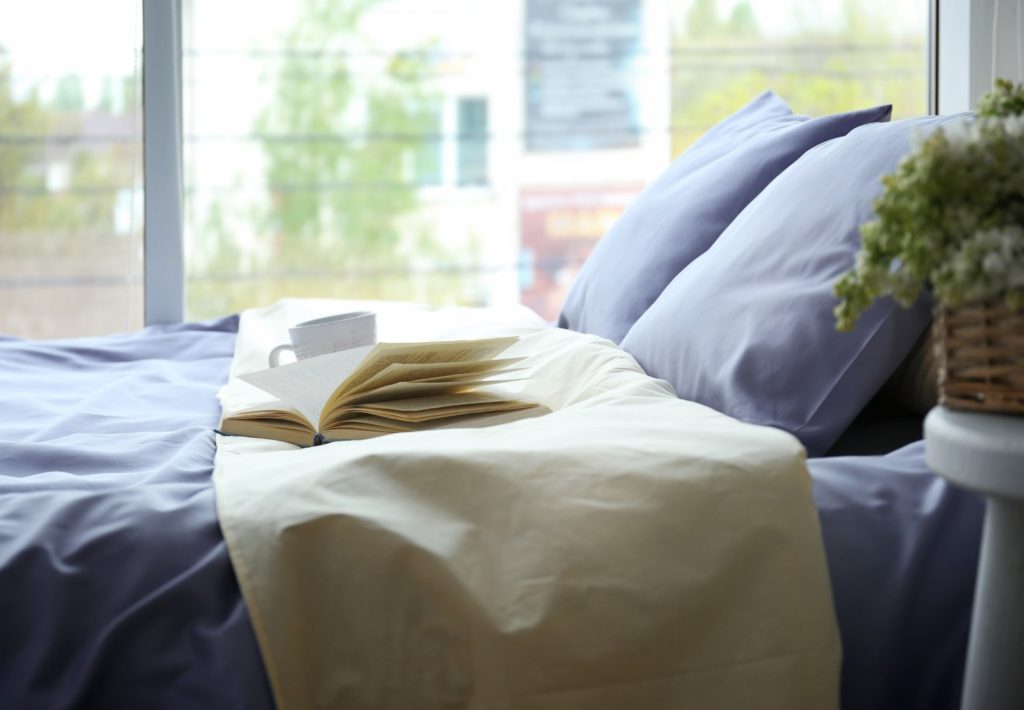
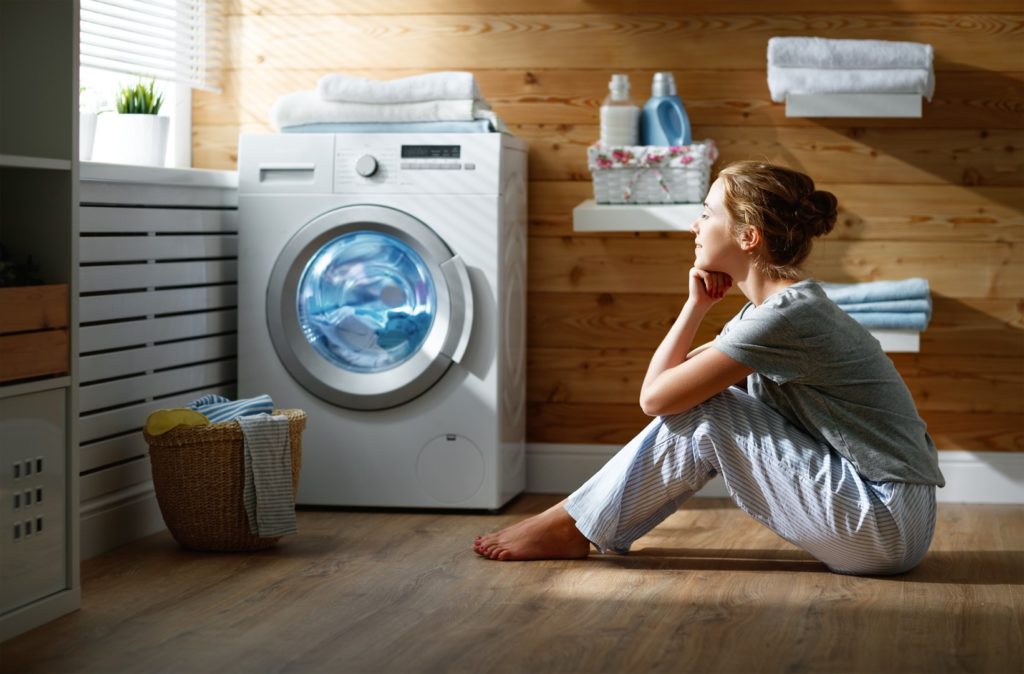
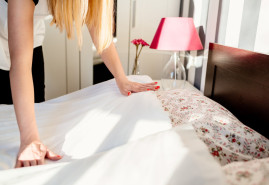
4) Clean Your Bed

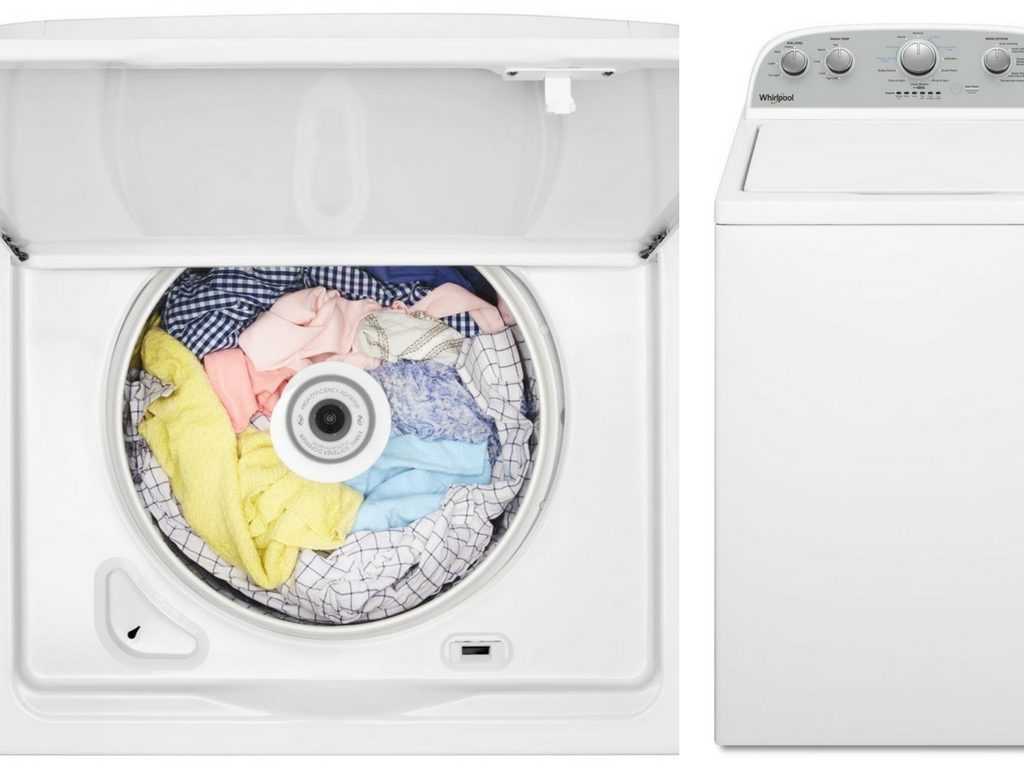
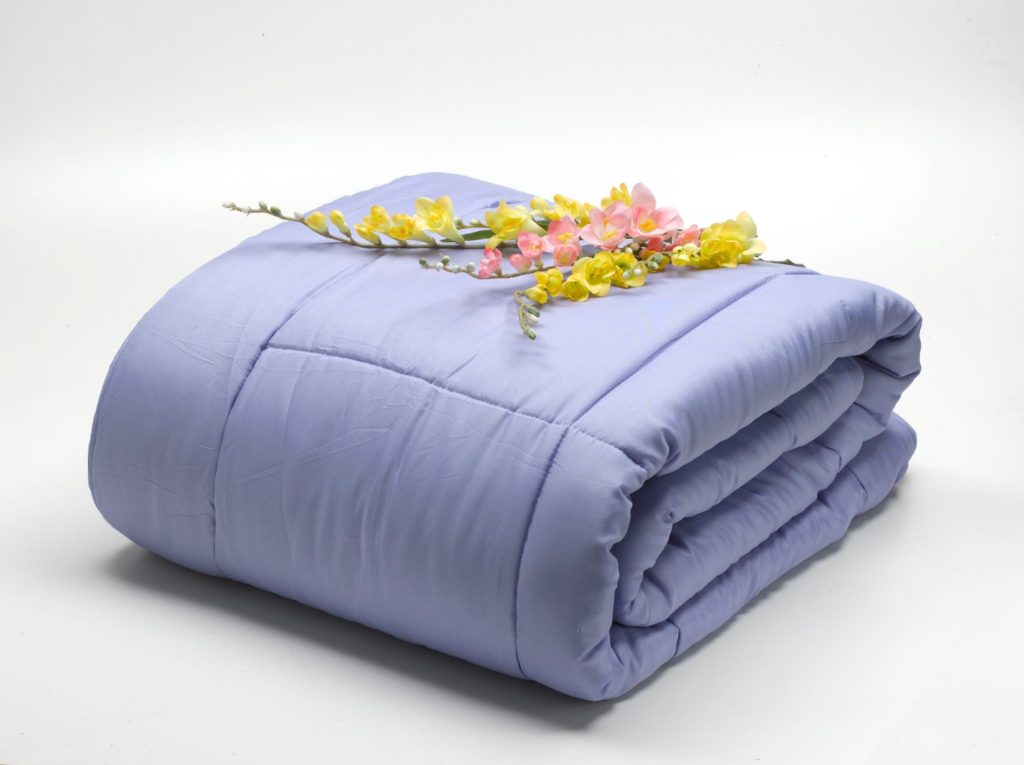
Wash or Replace Your Sheets: The life expectancy of bed sheets is typically 10 years, but it is all dependent on the quality of the fabric, the wear and tear they have seen, and washing methods. Refer to this informative blog When to Change Your Bed Sheets for more expert-suggested guidelines.

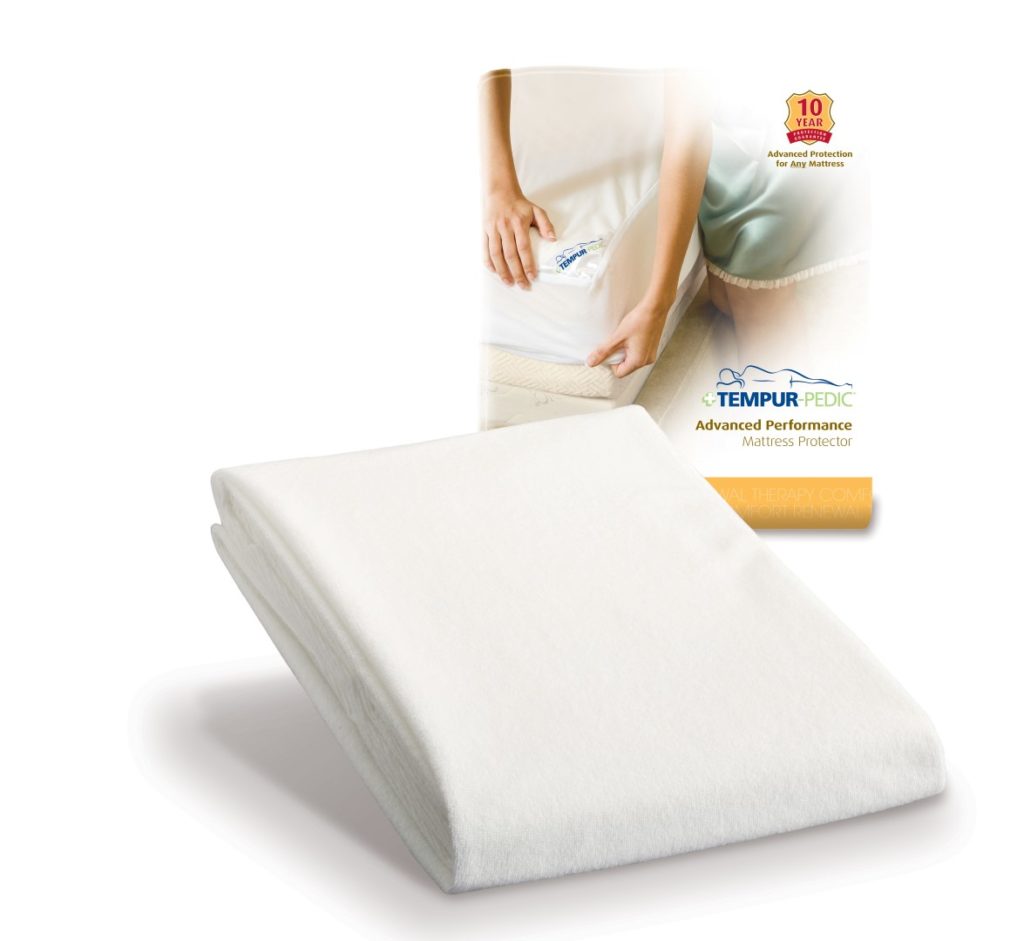
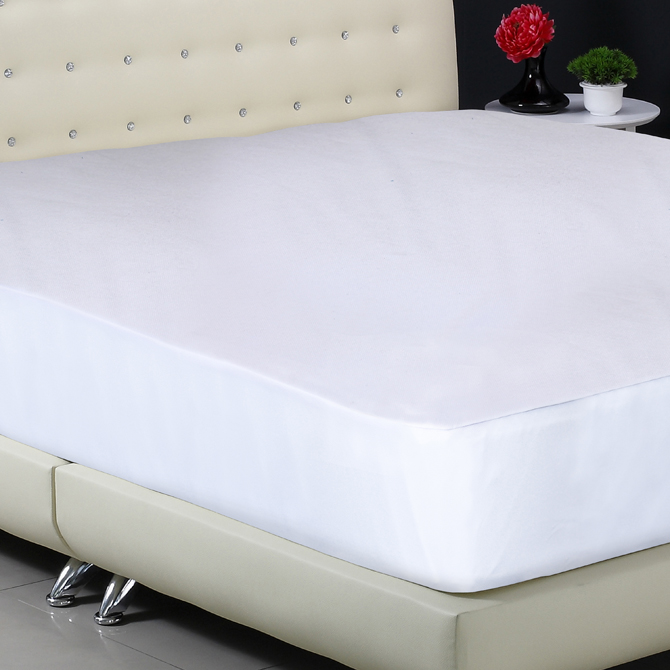
Use a Mattress Protector: Some consumers skip this level of protection for their mattress, but they really shouldn’t. To stretch the life of your mattress from the wear and tear, stains, and ensure allergen protection, mattress protectors should be your first line of defence! Read more from my previous blog Mattress Protectors: The Buying Guide.

Vacuum Your Mattress and Bed Frame: One last step before you place your mattress protector and sheets back on, make sure the mattress top gets a good vacuuming. Sprinkling some baking soda infused with a few drops of lavender oil will ensure that you are getting to the microscopic bugs and bacteria.

Your headboard and footboard, as well as your bed frame, should get a good clean, ideally with a damp cloth.

For complete information about how to care for your mattress, read these two blogs:

Vacuuming your bed frame

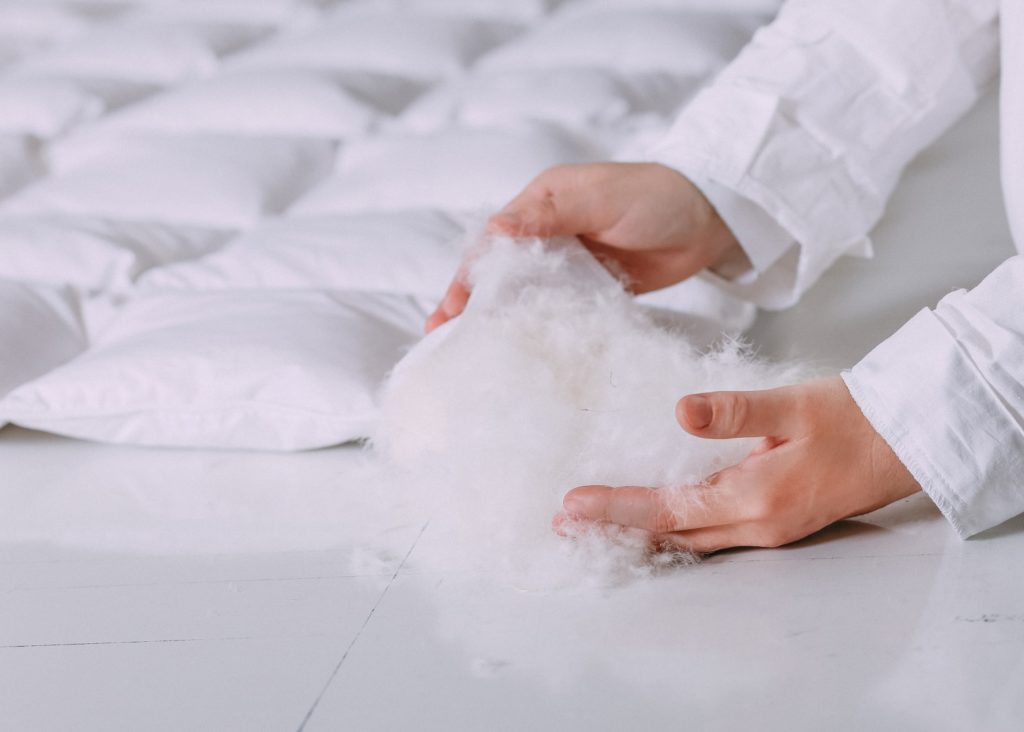
Don’t Forget Your Pillow: Where you place your head at the end of the day should be clean and protected from allergens. Wash your pillows regularly as per manufacturer’s instructions and always use a protective case before your bedding’s pillowcase.

These two blogs will help you with that step:

5) Declutter Your Drawers and Closet

This may be by far the most difficult for many as it usually means getting rid of stuff you no longer need but tug at your heart. The simplest route would be to use the KonMari method. This method for decluttering uses the philosophy of keeping only what makes you happy and not focusing on the end result of donating or discarding. It essentially becomes a meditative practice. See the Kon-Mari method in action below.

Happy Spring cleaning!

Angela, Your Sleep Expert

Updraft vs. Downdraft, Kitchen Ventilation Explained

Kitchen Ventilation Updraft vs downdraft

There are two main options when it comes to kitchen ventilation: an updraft range hood or a downdraft vent. Which is better depends on your needs, your space, and your preference.

To start, you need to determine your minimum ventilation requirement. Ventilation strength is measured in CFM, or cubic feet of air moved per minute, and there are a number of factors to consider when determining how many CFMs you need.

Measure the width of your cooking surface. It’s recommended that you have 100 CFM for every 12 inches of cooking space, and 100 CFM for every 10,000 BTUs your stove is capable of generating. Cooking with gas will require a minimum of 400 CFM. At a bare minimum most building codes require 400 CFM when you’re cooking with gas, and if you cook with a lot of oils then you’ll need to add an additional 100 CFM to ensure you have enough ventilation to draw the grease from the air.

Updraft Kitchen Ventilation

Updraft ventilation consists of a vent (or hood) located above a cooking surface. Air is drawn into the fan, passes through filters, and is either exhausted outdoors through a metal duct or re-circulated back into the kitchen. This type of ventilation is the most effective for removing smoke, odours, and particulates naturally rise into the vent.

The downside to updraft ventilation (pardon the pun) is keeping the apparatus clean: filters must be checked, cleaned and in some cases changed regularly and the vent may be difficult to clean. Some fans are noisy – do a sound-check before you buy. And the more sophisticated the design, the more costly the apparatus.

However, if you have professional-level appliances, do a lot of grilling or frying, or cook with gas, then you should definitely consider updraft ventilation. Visually, updraft ventilation can be more obtrusive, but your kitchen will stay cleaner, you’ll successfully vent more heat, and capture more odours then you will with a comparable downdraft unit.

Downdraft Kitchen Ventilation

Downdraft kitchen ventilation

Downdraft ventilation is integrated into your countertop or cooking appliance for a more streamlined appearance. In fact, most models feature a vent that rises up next to the cooktop when you are cooking and then recedes back into the base when not in use. Drawing air down from the cooking surface, downdraft appliances vent through your cabinetry where the filtered air is then recirculated or vented outside.

If your cooking generates a lot of steam, if you have an island cooktop that can’t support a hood, or you really just don’t like the look of an over-the-range appliance, then a downdraft vent could be your best choice. Easier to clean and more effective at whisking away odours and smoke than updraft units, downdrafts struggle when it comes to drawing steam from taller pots and pans. They may also “steal” some heat from your cooktop and because of those types of inefficiencies, they generally aren’t recommended if you require more than 300 CFM.

When it comes to ventilation, it’s always better to be safe than sorry. Be sure to talk to a contractor if you have any concerns and always remember that you can never have too much fresh air.

Isabelle, Your Appliance Expert

How to Deep Clean Your Bed in 5 Steps

Deep Clean Your Bed in 5 Steps

Cleaning your bed does not have to be the toughest chore on the list. Although some items composing your bed should be washed weekly, other pieces can use a clean on a varying schedule. When you strip down your bed, you should have sheets and pillow cases, mattress protector, comforter or duvet, throw pillows and shams, and, of course, the mattress itself.

Let’s take a closer look at each of these products on their own, but remember to always read the label for the manufacturer’s suggested product care.

1) Sheets and Pillow Cases

As these are the items that are closest to our bodies and therefore more likely to be soiled, they should be washed on a weekly basis. To reduce your chore list, consider a backup set or two in your closet, and wash them at a later time. Although there are soaps that work best in cold water, always wash these in hot water to remove all traces of allergens. Place them in your dryer in the gentle cycle with a couple of tennis balls to keep them from clumping and tumbling smoothly in the machine.

2) Mattress Protector

These are the workhorses of your bedding. The best quality ones that promise allergen protection and stain resistance can be washed every 2 or 3 months. Consider every change of season to help you remember your schedule. Of course, reading the label for the manufacturer’s washing instructions should always be considered. Most can be washed in warm water and tumble dried.

If you don’t have a mattress protector, you should seriously consider buying one. Check out our buying guide here for things you should know when shopping for one.

Cleaning Your Duvet and Comforter

3) Duvets or Comforters

Sticking to the same schedule as you did for your mattress protectors, clean your duvets or comforters seasonally. Most of them can easily fit into your standard washing machine but make sure to follow the manufacturer’s washing instructions to protect your investment.

Depending on their usage and materials, some comforters may require an industrial machine wash. For information on how to clean duvets and comforters, read our previous blog, How to Wash Duvets and Comforters.

4) Pillows

Two at a time, these can be easily washed and whitened in a regular washing machine on a monthly or seasonal basis depending on their usage. Throwing in the pillow protector with your sheets weekly wash will add extra cleanliness. Feather, down, or polyester-filled wash well in a standard machine while moulded pillows should be vacuumed regularly.

For more tips, refer to our blog “How to Wash Pillows”. If you own a Tempur-Pedic pillow, this is how you should clean it Tempur-Pedic Pillow Care.

5) Mattress

Finally, the cleaning of your bed wouldn’t be complete without cleaning the mattress. While your sheets and mattress protector are in the wash, sprinkle baking soda with a sieve all over the mattress surface. Let sit for an hour, then vacuum. Take the time to rotate your mattress to reduce body impressions, and clean your headboard and footboard as well as your bed frame.

For more information about how to care for your mattress, read our previous blog How to Clean and Care for Your Mattress.

Now that you know how to take care of your sleep system, let’s get cleaning!

Angela, Your Sleep Expert

Top Load vs. Front Load: Which Washer Is Best for Me?

Top Load vs. Front Load Which Washer Is Best for Me

When it comes to picking out a new laundry pair, deciding between top load or front load isn’t a matter of ‘what’s best’, but more a matter of ‘what’s best for me’. There are many advantages for both types of machine so it is ultimately up to what you prefer and what works best for your home. Here’s a short list we hope will help in your decision-making.

Front Load Washer

Front Load Washer

A front load washer is for you if:

  • Your laundry room is tight on space, this washer can be stacked.
  • You want to wash more items at once and accommodate bulky items, without sacrificing cleaning performance. The front load washer’s large capacity allows for this.
  • You want to add in the power of steam! Many units also let you add steam to the wash cycle to improve stain removal. Several brands offer steam power in both front load washers and their dryers.
  • You want to be energy efficient. Front-loading machines are the most energy efficient since their wash cycle uses less water and the high spin speed of front load washers extract more moisture from wet loads, which means you can also cut down on drying time.

Top Load Washer

Top Load Washer

A top load washer is for you if:

  • You have limited movement or would like to limit the bending required to load from the front.
  • You’re a little forgetful and want the freedom some top-loaders still offer to add laundry after the cycle has started.
  • A short wash time is important to you.
  • You are on a second floor or you want to minimize vibration from the spin cycle.
  • You do laundry infrequently (they are at the cottage) and don’t want musty scents or mildew to grow.
  • You find its control panel uncomplicated and intuitive-to-operate.

Still need help deciding what washer will work best for you? Visit your local BrandSource store and one of our appliance experts can help you pick out the perfect laundry pair.

Isabelle, Your Appliance Expert

Further reading:

How to Wash Duvets and Comforters

How to Wash Duvets and Comforters - Large

Although duvets and comforters are both the last covering we place on our bed, there are distinct differences between the two, namely their fabrication, filling and care.

Follow me as I go through some of their differences and explain how to wash duvets and comforters.

Duvets

What is a Duvet?

Duvets are essentially bags filled with down, feathers or polyester fibres for a lofty soft comfort that sits gently on the top of your mattress. Their pocket stitched design promotes warmth in the winter and coolness during the summer.

They are stuffed into a fashionably designed bag, or duvet cover with a zippered or buttoned closure, and may have matching shams and decorative cushions. The overhang off the edges is minimal, so a bed-skirt to cover the base mattress is suggested.

What is a duvet

How to Wash Duvets

Unless the manufacturer’s label states otherwise, washing duvets can be done in a standard washing machine, unless it is polyester-filled which may require industrial-sized-washers and dryers. Synthetic fibres do not flatten, as natural fibres do, so their volume remains the same requiring more room to agitate.

A small amount of gentle soap in the gentle cycle every season will be enough to restore its freshness and extend the life of your duvet. An extra cold-water rinse will help remove any soap residue. If there is any yellowing of the fabric, consider adding 1 cup of peroxide and ½ cup of white vinegar to your detergent, which will restore the whiteness.

How to Wash a Duvet

Your duvet and cushion covers can be easily washed weekly along with your bed sheets. It all depends on how many sticky fingers or soiled paws come to rest on your bed. Throwing in a couple of tennis balls into the dryer on the low temperature setting will prevent clumping of the filling and help with the tumbling.

Make certain that the filling is completely dry before throwing it onto your bed to prevent mould. It may require a couple of hours. Once dry, a good shake to fluff up the pockets of filling will restore that soft lofty look that is customary on a duvet-covered bed.

Comforters

What is a Comforter?

Comforters have less filling, have an intricate stitched design throughout and typically hang to the floor. They are generally sold in the bed-in-a-bag concept where a complete set of matching items like shams, cushions, and sometimes even curtains are included. In many cases, these are mostly decorative and removed completely at bedtime while a blanket for warmth and comfort lies underneath it.

In many instances they have a usable reversible side, which can extend its washing cycle if it is soiled. Nevertheless, washing them regularly is still the best way to keep allergens at bay, and stains from forming when there are spills, sticky fingers, or muddy paws about. As with duvets, giving them a good wash every season is ideal.

How to Wash a Comforter

How to Wash Comforters

Washing your comforter may not be very easy in your standard washer as most are polyester filled and as mentioned above, the fibres don’t flatten and require more space. Besides, they are much larger by design. Most of the cushions that come with the set have removable cases, but those that don’t can also be thrown in the wash in a standard machine depending on their size.

Following any specific manufacturer’s washing instructions, using a small amount of gentle soap in the gentle cycle will do the job. Any stains can be spot-treated beforehand. Although not as lofty as a duvet, there is some fluffing to do to get all the fibres back in their place. Using tennis balls in the dryer will restore your comforter back to its original state.

Whether you prefer duvets or comforters, keeping them clean and allergen-free for your comfortable sleeping experience is essential. Make it a seasonal thing!

Angela, Your Sleep Expert

5 Things to Consider When Choosing a BBQ this Summer

5 Things to Consider When Choosing the Right BBQ

Whether you’re a grill master or buying your first barbecue, knowing what to look for is key if you want your food to have that authentic outdoor flavour. Now that doesn’t mean you have to spend a fortune, but you do have to keep certain principles in mind if you want to get the most from your grill. With so many options out there, it’s easy to get confused, but with my help, you’ll be able to find the perfect BBQ for any budget.

You’ve got the apron, you’ve got the spatula and with that perfect barbecue, you’ll finally be ready to take your place as King (or Queen) of the backyard!

So let’s get started.

Fuelling the Fire

One of the first questions you’ll get when shopping for an outdoor grill is what type of fuel do you want to cook with? If you’re just starting out or looking for portability than propane may be the way to go. Like natural gas, propane burns cleaner than charcoal and is easier to control. If you’re looking for a more permanent set up, then natural gas barbecues are fuelled directly from your home gas line and require less maintenance than propane tanks.

If you want to stay away from gas, then charcoal or wood chips burning grills are your best bet. Although they take a little longer to cook, charcoal and chips are both available in a wide variety of flavours and are still the easiest way to maximize that smoky barbecue flavour.

Cooking Power vs. Cooking Efficiency

When talking about outdoor cooking, there’s nothing more seductive than power. A barbecue’s heat generation is measured in BTUs (British Thermal Units) and determines how hot the burners will operate. Most consumer grills fall within 25,000 and 60,000 BTUs depending on the size, the model, and the manufacturer of the machine.

That said, power isn’t everything. It’s much more important to cook efficiently with the heat you are generating, and a well-made 25,000 BTU cooktop will cook better than an inefficient 40,000 BTU model. Look for a good burner system with even heat distribution, a vapourizer system that covers the full width of the cooktop, and heavy cast iron or stainless steel grates that retain more heat. Price matters here, and expect to pay more for a more efficient machine.

When Size Matters

Most people barbecue to feed their immediate families. For the average consumer, a 400 – 600 cubic inch area will easily feed 8 people or more. A good rule of thumb is that a small grill will cook 18 burgers, a mid-size grill will cook 28, and a large grill will cook 30 and up.

If space is tight, make sure you measure your BBQ area before you buy. And remember that warming zones and side burners allow you to expand your usable cooking space without a huge size upgrade. If you do purchase a smaller grill, lean towards one with a distinct burner system so you don’t have to sacrifice versatility or the ability to cook with indirect heat.

5 Things to Consider When Choosing the Right BBQ

Built to Last… or Not So Much

In addition to improved efficiency, a well-made barbecue is going to last longer, requires less maintenance, and will be safer than entry-level machines. When you’re inspecting a grill ask the sales professional what it’s made of. At the lower end, most barbecues are made of some combination of painted sheet metal and cast iron compared to stainless steel and cast aluminum in more expensive machines.

The ideal cooking surface should be one seamless piece of cast or welded metals. And the thicker the better. Carts should feel sturdy, and like a good cooktop, you want to find one that’s welded together instead of one constructed with nuts and bolts.

Finally, what are the grates made of? Cast iron and stainless steel grates will both give you great sear marks but expect stainless steel grates to last a lot longer. Cast iron grates will also require more maintenance, although porcelain coated options are less time consuming. Whatever material you’re considering, make sure you test the weight of the grates. Lighter grates may be hollow, or of inferior construction, and therefore less durable and effective than a grate with some heft.

Grilling Accessories

Once you’ve got the basics down, you can start expanding your cooking experience. Side burners, smoke trays, rotisserie kits, and sear burners are all upgrades to consider if you want to expand the versatility of your grill.

If you really want to take the next step, then consider a full outdoor kitchen. A built-in grill with an independent side burner, outdoor refrigeration including an ice cold beer dispenser is every summer entertainer’s dream.

But whatever your dream, just keep these handy tips in mind when you’re buying a barbecue and you’ll be grilling to perfection in no time.

Isabelle, Your Appliance Expert

DIY Dishwasher Detergent to Save Money

DIY Dishwasher Detergent to Save Money

If you’re looking to cut back on spending money, doing it in an environmentally friendly way is always best. Instead of purchasing pricey dishwasher detergent at the store, why not make your own? This way you have the option of putting only healthy, natural ingredients in the mix to ensure harsh chemicals aren’t destroying your dishes.

Before you ignore this idea because it sounds too complicated, you should know that making your own dishwasher detergent takes very little effort and time. Did we mention it also saves you money?

What You’ll Need

  • 1 Cup Washing Soda
  • 1 Cup Baking Soda
  • ½ Cup Lemon Juice
  • 1 cup Kosher Salt
  • 1 Cup Water

Mix It All Together

The ingredients are completely safe to use on your dishes, so feel free to add a little more or less to the concoction to make it your own. This special recipe will cleanse your dishes, fight grease, reduce hard water buildup, and smell lemony fresh.

Once you’ve mixed everything together thoroughly, you have the option to leave the detergent in powder form, or you can add water. If you decide to add water, you’ll be able to scoop the mixture into an ice cube tray so that it sets in that shape. Let them dry in the sun for about 24 hours before cracking the trays opens to retrieve them like you would with ice. Store them in Ziploc bags or an airtight container for best results.

Is It Worth It?

Yes! It’s fast, easy, and the ingredients are natural! The longest part of this whole project is letting the dishwasher detergent dry in the sun – which isn’t even necessary if you decide to keep the detergent in a dry powder form. The best part? You’ll save greatly on this do-it-yourself project!

Your built-in dishwasher needs a detergent that won’t harm it, and with this DIY detergent, you won’t go wrong. If you happen to be looking for a new dishwasher for your specially made detergent tabs, visit us to find great stainless steel dishwashers from brands such as Maytag, Whirlpool and KitchenAid. Your new stainless steel dishwasher will be durable and powerful and ready to take on anything – including your dirty dishes.

Isabelle, Your Appliance Expert

What Not to Do with Your Tempur-Pedic Mattress

What Not to Do with Your Tempur-Pedic Mattress (Large)

If you are a first-time owner of a Tempur-Pedic mattress, you understand how life changing it really is. Sleeping is better, your mental health is better, and your body is probably more relaxed than it’s been in years. Basically, sleeping on a Tempur-Pedic mattress is much different than any other mattress you’ve probably slept on in your life so you will understand that the care for it is different as well. Take these tips into account when taking care of your new Tempur-Pedic bed so that yours can live a long and robust life.

Don’t Rotate

Most beds need a good flip and a rotation every couple of months to not get soft in spots, increase the mattresses lifespan, and ensure your spine is aligned and not sinking in due to continuous use. Your Tempur-Pedic mattress is firm and meant to stay exactly the way you bought it. Forget rotating with these mattresses. Tempur-Pedic doesn’t easily change shape and will be able to handle a lot of use for several years.

Don’t Drink on the Bed

We can’t tell you what to do, but we can at least warn you. Bringing liquid on your bed is fine, but spilling it on your Tempur-Pedic Hybrid Mattress or any other Tempur-Pedic mattress, can be ultimately damaging to the foam. Fluids and Tempur-Pedic don’t go well together so in order to maintain the bed’s durability, you will want to prevent accidents from occurring. Although if one does happen, you can act quickly and absorb the liquid with a clean cloth.

Tempur Pedic Mattress Protector (Large)

Don’t Purchase Just Any Mattress Cover

With Tempur-Pedic beds, you will need a mattress cover. Obviously, one would be helpful in the incident a spill were to occur. If you are interested in getting a mattress cover, talk with a sales associate at your local BrandSource store carrying Tempur-Pedic Mattresses to find out what mattress cover works well with a Tempur-Pedic mattress.

Gerry, Your Sleep Expert

4 Tips for Keeping Your Mattress in Decent Shape

We’ve said it before and we’ll say it again: Mattresses are not cheap. It’s not for a bad reason, either.

Beautyrest Mattresses are made with materials that aim to support, comfort, and contour your body so you can sleep well to live a healthy life. Science and creativity went hand in hand to design and build your rectangular sleep haven, and every bit of it is worth every bit of money you need to put into one.

With that said, once you’ve bought one, it’s your responsibility to take care of it, just like it’s working to take care of you. Give your mattress the love it deserves by trying out some of these tips.

1. Just like your back, your mattress needs good support

What does your mattress sleep on? Do you place it on a box spring? A bedframe? Do you just place it on the floor? Many people don’t realize this, but what your mattress lays on is crucial to its health. Depending on whether your mattress is a spring mattress, memory foam, powerbase, adjustable bases or another specialty mattress, will help you figure out what kind of support it needs. Getting the right support for your current mattress will make a dramatic difference in its life expectancy.

Polyurethane Mattress Protector

2. Mattress protectors will shield your mattress

It’s simple, but it works. A mattress protector will prevent stains, spills, allergens, sweat, and more from getting all over your Beautyrest Mattress. The cleaner your mattress stays, the less wear it will show and feel over time. The cleanup is easy and you are less likely to get sick. Remember to still wash your mattress protector!

3. Wash your sheets and blankets often

If you don’t use a mattress protector (something we don’t recommend) wash your bed sheets, blankets, and pillowcases regularly to prevent bacteria from growing. We suggest doing it at least once every week or two.

4. Give the pets their own bed

We all want to snuggle with our pets in bed, but you’ll soon regret it. All the animal hair, allergens, oils, and so on that your animal carries on their body will soon be on your bed – resulting in a dirty mattress! Do you and your mattress a favour and get your fur friend their own bed.

Visit your local BrandSource retailer carrying Beautyrest Mattresses for more ideas on how to protect your bed!

Angela, Your SleepExpert

How to Keep Your Samsung Stainless Steel Appliances Clean

Keep Your Samsung Stainless Steel Appliances Clean

Stainless Steel appliances are the trendiest style of kitchen appliances for a reason – they look good and hold up well for basically an eternity. The biggest problems that can occur are when fingerprints and water marks start showing up on the surface. While this isn’t a big deal on most appliances, it will start to make your refrigerator look a little grimy if not wiped away often. It doesn’t take much to clean stainless steel, so give all your Samsung appliances some love with a little sprucing up!

Daily Maintenance is Key

How many times do you open your fridge a day? Do you put your head against the oven door when peering inside when baking? Does your microwave have food drops on the interior and exterior? Needless to say, your appliances get a lot of use. If you aren’t opening them, you’re touching their buttons or spilling food on them.

The best and easiest way to keep a stainless steel appliance clean is by simply cleaning it every day. Grab a microfiber cloth and just add soap and water. Then dry it off. Your stainless steel dishwasher or other Samsung appliances are instantly spotless.

Keep Your Stainless Steel Appliances Clean (Large)

Go with the Grain

Knowing that all you need is a microfiber cloth, soap, and water to make the perfect cleaner is not enough – the way you clean your appliance will make all the difference.

Stainless steel is like wood in the way that it has a grain to it. Look closely and you will see some lines which you will want to clean in the direction of. If you don’t, dirt is more likely to stay in the small crevices and build up over time. Take a second to figure out which way the grain goes and clean it in that direction so your Samsung refrigerator or other stainless steel appliance continues to shine for a long time.

It doesn’t take much to keep stainless steel looking pristine, which is why they are the preferred style for appliances. Upgrade your kitchen today with Samsung stainless steel appliances.

Isabelle, Your Appliance Expert