3 Tips to Start Waking Up Early in a Beautyrest Mattress

3 Tips to Start Waking Up Early in a Beautyrest Mattress

“Early to bed and early to rise makes a man healthy, wealthy, and wise.” – Benjamin Franklin

Waking up early isn’t always an easy task. It takes skill to get to bed early, wake up early, and not feel like you need a gallon of coffee to keep you alive throughout the day. But if you need to start getting up in the morning at an early hour, yet are finding it difficult, it’s time for you to start changing some of your habits.

Of course, it may not be your fault that you can’t get to bed or wake up early. Your mattress could be the culprit. After you get your new Beautyrest mattress, be sure to try out these tips to help you start getting up early in the morning first.

Tip #1: Be Consistent

Choose a time you want to start going to bed each night and stick to it! The same goes for when you wake up in the morning. There’s nothing more confusing for your body than an irregular sleep schedule, so creating specific times for yourself will help your body begin to normalize and easily fall asleep/wake up at those times you’ve chosen.

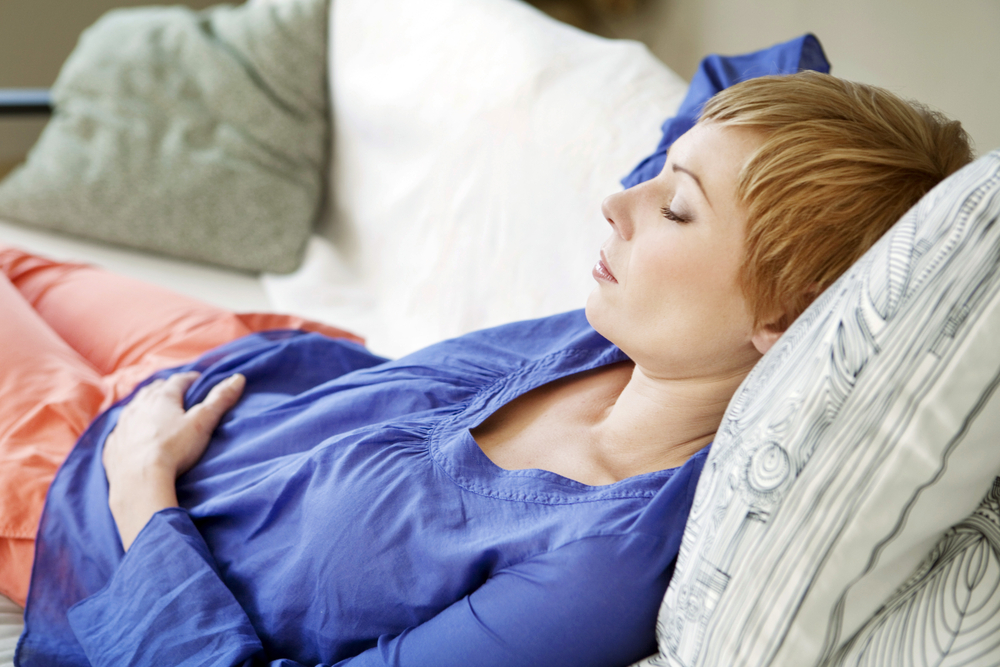
If your body fights you on sleeping earlier and continues to sleep in, it could be your mattress making things difficult for you. With a Beautyrest bed, you’ll have an innovative mattress made to give your body the support it needs to pass out quickly every night, making it easier to wake up early.

Tip #2: Place the Alarm Far Away

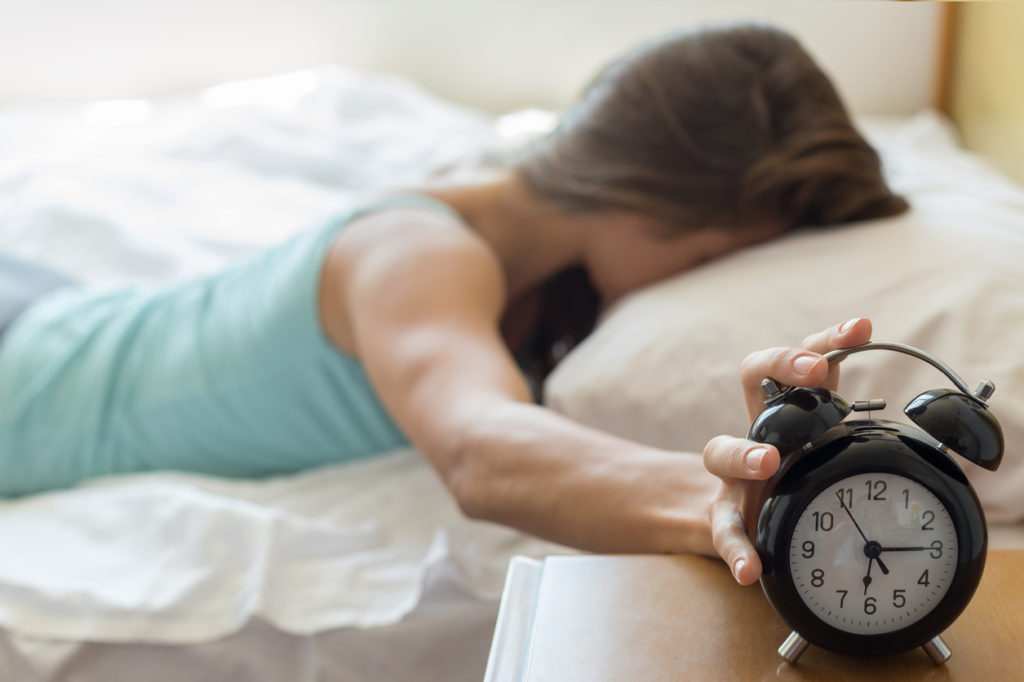
This may be the oldest trick in the book, but it works! Every night before you hop into bed, put your alarm clock or your phone in a place that’s far enough away from arm’s reach. That way, every morning when your alarm goes off, you’re forced to either get up and turn it off right away or listen to it ring until you can’t take it anymore and then get up and turn it off anyway.

Drink Caffeine in the Mornings Only

Tip #3: Drink Caffeine in the Mornings Only

Having beverages with caffeine is all fine and dandy, unless it’s after two in the afternoon. Drinking caffeine late in the day can horrendously affect your sleep schedule and keep you up, till all hours in the morning if you’re especially sensitive to caffeine. Even if you think you can handle it, it’s best to save your caffeine for the morning to avoid causing any sort of sleep disruptions in the night.

It’s not always easy to wake up early in the morning. But, if you’re actively trying to wake up early, yet are still struggling, it’s almost certainly time for a new mattress. At our store, we provide Beautyrest mattresses that are so luxurious, you never have to struggle again with your sleep schedule. Each mattress is made to help restore your sleep and give you more energy throughout the day. Visit us to find the Beautyrest mattress that will truly help you sleep better so you can wake better.

Gerry, Your Sleep Expert

What Furniture Do You Need for Your New Home?

Congratulations! You’ve done the hard part: You’ve found a home, you’ve purchased it, and now you are getting ready to move in. Now comes the fun part. Furnishings!

Sure, you could go through the hassle of moving all your old furniture, but wouldn’t it be much more fun to turn over a new leaf and decorate this place with brand new, awesome stuff? Yeah, I thought so, too. Even better, you don’t have to go far for your shopping trip – we’ll help you pick out your new favourite furniture!

So, here are a few of the basics that you’ll need to help make a space feel like home, and also to make sure that your guests have someplace to sit when they come over to play Poker and Monopoly.

1. Something to Sleep On

This should probably be the first thing you knock off your checklist, unless you want to spend the first few nights in the new place sleeping in a pile of sheets on the floor while the cat sits and stares at you and wonders why you aren’t on a nice, comfy bed.

All that aside, moving is stressful, and you probably aren’t going to get it all done in one day. At the end of the night, you’ll want someplace to sleep, so start with your mattress, bed frame, and any other bedroom furnishing you need to feel right at home.

2. Something to Relax On

Now that sleeping is taken care of, you’ll want to go to the next best thing … relaxing! You aren’t going to just spend all of your time standing in your new apartment – at least you shouldn’t – and you’ll need something to just chill out on.

You’ll probably want a CLD, otherwise known as a couch-like-device. Perhaps a new Elran sofa? Or maybe a smaller version called a condo sofa? How about an Elran sectional and its many options? Or you could get a recliner and combine it with a loveseat. Go with whatever you feel, just make sure to plan to have something for your living room.

ELRAN 4022 Reclining Sofa

Elran provides reclining furniture where both comfort and style are combined; it sits well and looks good. By selecting an Elran piece of furniture for your home, you’ll get to choose amongst the variety of leathers and fabrics available – whether you like traditional brown or opt for fashion-forward purple – they have the options.

3. Something to Entertain With

With the living room relaxation taken care of, next you’ll need something to do with your free time. You could sit there all day on the Elran couch and marvel at how good of a deal you got on the house and how many millions of years you’ll be paying the mortgage, or you could get a life and find something fun to do!

A new TV is always perfect for a new house, especially if you upgraded and have more room – which means you’ll now have the space for a bigger TV!

Of course, your entertainment options don’t need to be electronic in nature. You could go for something else: A pool table perhaps? Or maybe making one area into a cool little yoga nook? It’s your new space. The options are limitless.

4. Something to Eat Off Of

Hmm. Do you hear that? That’s probably your stomach growling since you made it this far on this list and I haven’t mentioned a kitchen table yet.

Young couple having dinner in new home

Yeah, one of the other important pieces of furniture you’ll need is a kitchen table, or at least something to eat off. If it’s just you in the house, you could get by just fine with a coffee table, but if your family keeps growing, you’ll probably want an actual kitchen table.

Of course, with the table you’ll also need to get something — or somethings I should say — to sit on. Chairs for the table, and a few for the living room and other entertaining spaces is probably a good idea, as well. It’s kind of anti-vogue to ask guests to bring their own seating arrangements, apparently.

5. Decorations and Special Touches

With the major necessities out of the way, now you can get to the even more fun part of the fun part. That vaulted ceiling looks perfect for a chandelier, doesn’t it? Always wanted a giant purple, fuzzy rug? Go for it.

Decorations and special little touches are going to be what truly makes your new house feel like home. Put some artwork – or posters – up in some frames, get some potted plants, grab a cat tower for the kitties, and whatever else you need that brings you joy.

No matter what your furniture needs are, don’t forget that we are always here to help. Be it with your new home, or just to upgrade your furniture in your old home, we’re always here to guide you through your furniture shopping and make sure you find just what you are looking for.

Alex, Your Furniture Expert

Decorating with Fall Colours and Signature Design by Ashley

Decorating with Fall Colours and Signature Design by Ashley

Breathe in that brisk, fall air! It’s finally that time of the year again: The air is starting to cool down, the leaves are falling, and it’s the perfect weather for jackets and boots and scarves and pumpkin spice, well, everything.

Of course, you aren’t the only thing that should be dressing up for the season – your whole house should be joining in the celebration! Throw aside those bright, summery colours, and get ready to bring fall into not just your wardrobe, but your décor, as well.

With these tips, you’ll be able to freshen up your whole house for the season, and still have time to enjoy the decorations before the winter chill comes. Let’s make like a pile of leaves and jump right in!

Falling for Fall

Like summer’s bright pastels and seaside beach-friendly tones, fall offers its own unique palette of colours. With reds, yellows, purples, blacks, oranges, browns, and mixtures and shades of all of the above, the colour decorating options for fall are quite open!

If you are looking to bring a touch of fall to your house, there are some easy places to start: Pull out some fall-coloured blankets and throws for an easy splash of colour. Replace your summer oven mitts and dish towels with ones adorned by leaves and pumpkins.

Even better, why not really seal the deal with a lovely accent piece? Perhaps a Signature Design by Ashley loveseat to go in that empty corner of your living room – it would be the perfect place to cuddle up and enjoy a book on a nice cozy fall evening!

Waiting Patiently for the Holiday Season

The whimsical and leafy colours of fall aren’t the only options you have for the next month, however. The great pumpkin festival that is Halloween may have passed, but that doesn’t mean that you can’t use holiday décor to further your fall festivities.

D568 Dining Room by Signature Design by Ashley

If you are expecting a crowd this year, nothing is quite the showstopper like a brand-new kitchen table and dining set to go with your festive placemats and centrepiece. Signature Design by Ashley offers amazing dining sets, and with something from one of their collections, you’ll be able to bring out the most of your new fall décor and have room for all of your growing family to eat at the same time. Bonus points!

Accenting Everything

The devil really is in the details, and that is especially true when it comes to decorating! If you really want to bring the fall spirit home, make sure to add some small personal touches that really reflect who you are – and what you love about fall! For example, you could get those pumpkin scented candles out, and you could even pull out some fall-coloured drapes and shades, too.

58502-26-OPEN Signature Design by Ashley Recliner

Better yet, given how exhausting preparing for the holidays can be, how about getting a nice recliner to go along with that new table? There’s nothing like kicking back after a hard day of cooking and eating, and you won’t find a seat more comfortable than a recliner from Signature Design by Ashley.

If you really want to celebrate the season, there’s no better way to do it than redecorating and refurnishing. With some new colours in your space – and with some new Signature Design furniture by your side – you can’t go wrong. Bring in fall in style!

Alex, Your Furniture Expert

4 Habits That Will Keep Your Palliser Couch in Perfect Condition

4 Habits That Will Keep Your Palliser Couch in Perfect Condition

So, you’ve finally made the plunge into getting that new Palliser couch you’ve been eyeing. Or maybe you’re still shopping around and you want to make sure this sofa stays shipshape as long as possible. If you’re determined to keep your next couch from falling prey to common-couch care mistakes, we can help you there.

Palliser Couch care can be a tricky business. Your couch is the place you spend most of your at-home relaxing time, so it can be easy to forget that it requires a bit of work to stay stylish and sharp. Who wants to think about chores after a long day at work? But, if you want to keep your sofa around for years to come, it’ll need a little TLC. So, begin the journey of preserving your couch with these four good sofa care habits.

1. Switch Up Your Seat

Uneven wearing is the silent killer of a good couch. Everyone has their favourite spot on their sofa – that place you like to crash every night after work, the spot where you could just curl up and eat popcorn and ice cream all weekend … Yeah, that spot will be the first to go, and it’ll bring the rest of your couch down with it if you’re not careful. If you put too much wear and tear on one part of your couch, the cushions will start to go lumpy fast, and after a while, the springs will start to sag, big time.

This is hardly conducive to a comfy couch experience, and to keep one side of your couch from falling into a black hole of discomfort, you may have to change up your habits. Try sitting in different places and different positions every day, so you don’t put any one area under too much strain. This will keep your Palliser couch springy and supportive even after years of use.

2. Flip Your Cushions

Even if you’re carefully changing up your sitting spot every day, your cushions can still start to wear down just from regular use. If they get too badly worn out, the stuffing can break down, clump up, or warp long before you would otherwise need to start shopping for a new couch.

No one likes a couch full of lumps and indents, but, if you get into the habit of flipping your cushions over every few weeks, you can keep the issue in check. Flip them upside down and front to back every now and again to make sure you’re making the most of every inch of those cushions.

3. Ban Food on the Couch

I get it, sometimes all you want to do at the end of the day is curl up with a box of cookies and hot chocolate and watch TV until you can’t keep your eyes open anymore. But when that mug of hot chocolate gets away from you, and more of those cookies end up in the cushions than in your stomach, your relaxing evening won’t be quite so relaxing anymore. So, prevent the mess altogether and make your sofa a crumb-free zone. Your future self will thank you.

But I get it, sometimes life gets in the way of even the best laid plans. If you really can’t get away with ditching couch meals entirely, at least put a protective covering down when you eat. A towel or sheet can catch the worst of the crumbs and soak up any undesirable spills before they reach your precious couch.

cleaning your sofa

4. Don’t Skip the Cleaning

It’s not just your carpets and bedsheets that should be getting a regular cleaning – your couch should get a thorough wash every now and again too! Arm yourself with a lint roller and a hand vacuum and you should make quick work of the worst of the dirt. Vacuuming the cushions every few weeks can help keep lint, hair, food particles, and other undesirables from building up in the fabric.

Be sure to remove the cushion covers and give them a wash every few months too (as long as the fabric is washer-safe). If you’re struggling with ground-in grime or soaked-in stains, steam cleaning is another great way to freshen up your couch and make it look like new again. A little planning ahead during your next couch purchase can make this step even easier. When you’re shopping for a new sofa, ask our staff about the different fabric options you have, and how you can best take care of each of them.

These simple rules will get you into the habit of couch upkeep in no time. If you hold yourself to it, your new couch will give you years of comfort and support. But, if you’re still searching for that perfect Palliser sofa to love and cherish, be sure to check out the options at our showroom! Now that you know everything you need to keep your couch looking and feeling great, we would love to help you pick out a Palliser sofa that you’ll love for years to come.

Alex, Your Furniture Expert

Check Off Your Chore List with Help from Maytag Appliances

Check Off Your Chore List with Help from Maytag Appliances

You come home from work Friday night, get ready to kick back and relax after a long week, when BAM, it hits you: that chore list you’ve been putting off since last weekend, just waiting for its moment to strike. Ugh. Sound familiar?

Well, getting your chores done doesn’t have to mean losing a weekend, or even an evening! With the help of Maytag appliances, you can check off that chore list and still have time for your evening binge-watches and weekend afternoons out.

Maytag appliances have tons of features that make housework easy, all from a brand you know you can depend on. So, let’s dive into the world of Maytag appliances, and learn how they can help you conquer your chores and give you back your “you” time.

Lighten the Load

With a Maytag washer and dryer, laundry has never been easier! Options like the Optimal Dose Dispenser – which lets you preload up to 12 loads worth of detergent – make starting your laundry as easy as pressing a button. Your Maytag then measures out the perfect amount for each load, so you never have to worry about wasting detergent or over-soaping your clothes.

The overnight wash and dry cycle also means that even if you’re short on time, you can still get your laundry clean and fresh, all while catching up on some much-needed rest. The Fresh Hold function even keeps clothes smelling and feeling fresh for up to 12 hours after a cycle is over! So, close your eyes, get comfy, and enjoy the feeling of your chores doing themselves.

Dinner Done Right

Maytag cooking range and microwave hood

Everyone loves dinner, but making it can be a real challenge sometimes. Whether your oven isn’t quite big enough to fit food for a family of five, or your stovetop burners just aren’t cooperating, your appliances can feel more like enemies than conveniences during dinnertime.

Enter Maytag. With gas, electric, and induction-powered stovetops, you’re sure to find the range or cooktop that suits you best. Maytag even offers power burners and oval-shaped burners for oversized pots and pans, giving you all the range, power, and flexibility of the cooking pros. You’ll be able to cook meals quickly and easily, and with Maytag’s sleek, streamlined designs, you won’t have to sacrifice style to do it!

Plus, single, double, and microwave combination wall ovens give you lots of options for baking, broiling, searing, and more! It may not make you Bobby Flay, but with Maytag, you can get dinner done your way, without breaking a sweat.

Don’t Play the Grocery Game

These days, it seems like everyone in the household needs a different menu. Your teen doesn’t eat meat, your tween is lactose intolerant, your little one can’t have gluten, and your spouse is deep into Paleo … that adds up to a lot of groceries!

Luckily, Maytag carries top freezer, bottom freezer, side-by-side, and French-door models, so you can customize your storage space to your family’s needs. Maytag fridges offer gallon-sized door racks that leave plenty of shelf space for all your food and lots of options for keeping that food its freshest!

Maytag fridges offer gallon-sized door racks

Temperature controlled deli drawers keep meats and cheeses at peak deliciousness, PowerCold technology chills all your food to optimum temperatures as soon as you shut the door, and humidity controlled crisper drawers with Freshflow Produce Preserver help lock in the flavour of your favourite fruits and veggies. Even the pickiest eaters won’t be able to resist!

Dishwasher Dreaming

Let’s face it, no one likes doing the dishes. You’ve just enjoyed an amazing meal with the family (cooked with your Maytag oven or stovetop, of course), but all too soon, you have to come back to reality and tackle that pile of plates growing in the sink.

With the help of a Maytag dishwasher, you can check that chore off your list in no time. Tiered, adjustable, and third-level rack options make sure you have plenty of space to fit absolutely everything you need into your dishwasher the first time around. No more handwashing those weird serving plates and salad tongs!

Maytag Dishwasher

In addition to lots of storage space, Maytag dishwashers also have powerful cleaning abilities, to get all your dishes done right. Steam sanitize, a 4-blade food chopper, and PowerBlast high-powered spray jets are just a few of the tools a Maytag dishwasher has at its disposal to eliminate germs and leave your dishes sparkling clean!

PowerDry cycles also get your dishes done faster, so you have plenty of time to put the kids to work emptying the dishwasher before bedtime. Now, you can go to sleep knowing you’ve checked everything off your chore list!

Chores don’t stand a chance against Maytag appliances! Their powerful features and simple design make your life easier, and let you get back to the important things faster. Come down to our store to see what models we have in stock, and to learn more about how Maytag can help you check off your chore list.

Amanda, Your Appliance Expert

Bosch Dishwashers Are So Quiet, It Won’t Distract You

Bosch Dishwashers Are So Quiet, It Won't Distract You

You know what’s annoying? Noise. Loud, distracting, bothersome, noise. Especially if you are trying to sleep, and all you can hear is the WISHH WASHHH WHOOOSH of your dishwasher. It may be great time management to have your dishes run overnight, but it can also be quite a rude awakening, if you can even manage to fall asleep in the first place.

Well, that used to be the case at least. With Bosch dishwashers, say goodbye to noisy wash cycles. Bosch is THE quietest dishwasher brand in Canada. And sure, I can say that, but unless I back it up, what does that really mean?

It’s time to get the science out to explain. Grab those microscopes and lab coats, because this is going to get real.

All That Blah Blah Blah

Bosch dishwashers are 38 dBA loud. How does that compare to other things? Let’s take a look. Conversation is everywhere. EVERYWHERE. Surely a Bosch dishwasher must be louder than that, right?

Nope. Conversational speech comes in at 60 dBA. That’s louder than the dishwasher you could have in your kitchen right this very second. If you don’t have a problem falling asleep with people talking in the other room, you’ll have no problem drifting soundly off to sleep with your Bosch Dishwasher running. In fact, it might be so quiet you could even forget that you started it in the first place!

Babbling Brooks

Take a second. Think of the quietest, most relaxing, peaceful scene you can think of. Focus on that a minute. Focus on the sounds and sights in your happy place. Maybe it’s in a green grassy valley, with a nice little stream running through it. Hear that peaceful, light noise of the brook as it babbles on by? It’s quite a pleasant sound, isn’t it?

It is. It’s also not that loud of a sound. There’s no way that a Bosch dishwasher is quieter than that.

Wrong again! A babbling brook is 40 dBA, which is still more than the 38 dBA Bosh dishwasher. You could place your dishwasher smack dab in the middle of your happy field, and the brook would be louder than it. Now that’s impressive!

Bosch Dishwashers Are So Quiet, It Won't Distract You (2)

Cannon Ball!

This one is just for fun. A howitzer cannon? That’s a whopping 175 dBA. Yeah. Dishwashers are much, much quieter than that. At least it is if it’s a Bosch.

Other Odds and Ends

We’ve already looked at a bunch of things that are louder than an amazing Bosch dishwasher. But we haven’t looked at other appliances yet, so it’s fair to say we haven’t been comparing apples to apples. Well, let’s do just that.

Computer? 40 dBA. Fridge? 50 dBA. Vacuum? 75 dBA. Toilet flushing? 75 dBA as well. All of your household appliances are louder.

The Whisperers

How loud is a whisper? Try 30 dBA. That means that if you are whispering right now as you read this at your desk, that noise is only just a LITTLE BIT softer than a Bosch dishwasher. How awesome is that?!?

In other words, if a Bosch dishwasher was a ninja, it would be the stealthiest and sneakiest ninja of all time.

So, what are you waiting for? Stop by today and get a new Bosch dishwasher, and say goodbye to that old loud noisemaker you used to call a washing machine. The quiet life is where it’s at!

Amanda, Your Appliance Expert

All You Need is a GE Microwave for Your Favourite Hockey Night Snack

All You Need is a GE Microwave for Your Favourite Hockey Night Snack

It’s the go-to snack at every sports event, and it fulfills all your cheese cravings: Yes, nachos are a party favourite. Although they are of Mexican origin – being tortilla chips drenched in liquid cheese and other toppings – Canada has found a way to serve them everywhere, because this delicious appetizer is perfect to share with friends and family.

So, when you’re throwing your own party this month for a hockey night, you’ll want to make these bad boys for everyone to munch on. One of the greatest things about nachos is the endless amount of toppings you can pour over them. Whether you’re a meat lover, vegetarian, lactose-intolerant, or have other dietary restrictions, your nachos can be custom-made to fit your eclectic taste buds.

Because there are so many options out there, I am going to walk you through how to make the simplest form of nachos, and let you throw on the toppings you desire afterwards. All you need are three items to make this cheesy chip happen.

Ingredients

1. GE Microwave
2. 1 Cup Tortilla Chips
3. ¼ Cup Shredded Mexican Cheese

It’s really that simple! But if you’re feeling a bit on the adventurous side, you can always add a spoonful of sour cream, guacamole, or even half a cup of black beans to add a little flavour to your dish of nachos.

All You Need is a GE Microwave for Your Favourite Hockey Night Snack (2)

How to Prepare Your Nachos

Grab a paper plate or another plate that is safe to microwave on. It should feel sturdy so that it can hold the heavy melted cheese and toppings. GE microwaves come in various sizes, so depending on the one you choose, yours could be large enough for even a party platter for all your nachos!

Once you have a strong plate, it’s time to lay your tortilla chips down! Be sure to arrange them so there is only a single layer. That way you can ensure the cheese covers every single chip. No tortilla chip left behind!

Although, I only told you to use ¼ cup shredded Mexican cheese, feel free to use as much as you want for this portion. “The more cheese, the better,” is a motto I happily live by. Take a handful of the shredded cheese and sprinkle it over your chips, making sure every morsel is equally blanketed.

Without further ado, open your sleek GE microwave, place your cheesy chips inside, and cook on high for 1 minute. Feel free to play with the time to get it just right for you. Can you smell the warm tortilla chips soaking in cheese yet?

While there are many advanced and cool features of a GE microwave, it doesn’t take much to make nachos. But, if you are someone who enjoys nachos regularly, the GE microwave allows you to create custom settings with the My Cycle feature, so all you’ll ever have to do is touch the glass touch control buttons and your favourite dish will be cooking just the way you like.

Celebrate Hockey Nights this year with a plateful of your very own homemade nachos! Find any GE microwave at our store and make them just the way you like them!

Amanda, Your Appliance Expert

7 Steps to a Cleaner Whirlpool Fridge on National Clean Out Your Refrigerator Day

7 Steps to a Cleaner Whirlpool Fridge

If you’ve been looking for a sign that it’s time to bust out the cleaning supplies and give your fridge a little TLC, you’re in luck: November 15 is National Clean Out Your Refrigerator Day! The holiday was created by Whirlpool about 20 years ago, as a way to celebrate the most important appliance in your home. What better way to celebrate than by cleaning out your own Whirlpool fridge?

With the holidays coming up, you’ll need all the fridge space you can get! So, celebrate your Whirlpool and prepare for holiday feasting by following these seven steps for cleaning your fridge inside and out.

Step 1: Get Prepped

Before you get started, you may want to unplug your fridge if possible, or at least turn it off. You’ll be using lots of water, so it’s safer to keep electricity off to avoid sparks, shocks, and fires. Plus, you won’t waste electricity by letting all the cold air out of the fridge.

Once your fridge is off, you’ll want to collect a few supplies before you get started:

  • Non-abrasive sponge
  • Bucket
  • Baking soda or white vinegar
  • Large cooler
  • Trash bags
  • Handheld vacuum or shop vacuum
  • Toothbrush

Step 2: Take Everything Out

And I mean everything! Condiments, leftovers, and even removable shelves and door racks should all come out. Make lots of room in the sink and on countertops and resist the temptation to leave small items you think you’re going to keep inside the fridge – you have time to decide what stays and what goes later. For now, just empty it aaaaall out. I promise, it’ll make the whole process much easier!

Prepare a large cooler full of ice for the perishable items too. With your milk and eggs safely tucked away on ice, you don’t have to worry about your food’s freshness while you work.

Step 3: Start Scrubbing

This step will be easiest if you’ve taken all the shelves out of your Whirlpool fridge. Take any components you’ve removed from the fridge, fill your sink with warm, soapy water and go to town on the sturdy, frameless glass shelves. Be sure to use a non-abrasive sponge, so you don’t scrape up the glass!

If your shelves have stubborn, stuck on gunk, try mixing some white vinegar or baking soda into the water – both are great for getting in deep and taking care of even the stickiest spills. You can also try a toothbrush for removing sticky spots – they’ve got more scrubbing power than a typical sponge, but are still soft enough to not scratch your shelves.

How to clean a refrigerator

Step 4: Wipe it Down

Be sure to get any surfaces that can’t be removed. Fill a bucket full of soapy water and wipe up any gunk on the walls or crammed into corners. You’d be surprised at how many stains go unnoticed underneath milk jugs and Tupperware! Pay extra close attention to your Whirlpool’s Gallon Door bins, especially if they aren’t removable. Once everything is thoroughly cleaned, dry it all out with an old towel.

While you’re cleaning, make sure your FreshFlow Air filter doesn’t need replacing. If the filter has been functioning at full throttle, your fridge shouldn’t have any problems with smells. FreshFlow filters are six times more effective than baking soda at soaking up odours, but they do need to be replaced every six months for best results. Use this opportunity to check and replace your filter if needed.

Step 5: Do the Detail Work

Once the inside surfaces are cleaned, make sure to take care of all those extra details that can easily get forgotten. Bust out the vacuum and clean out the grate and toekick area. These spaces can get packed full of dust without you even noticing, and your fridge wastes a lot of electricity trying to cycle air through gummed up grates.

Be sure to clean and sanitize the outside and edges of the fridge as well. Stainless steel can be cleaned with a paper towel and some white vinegar – don’t use any water though, it can leave behind streaks! Other fridge finishes can be cleaned with just soap, water, and a sponge. Pay special attention to the seals just along the inside edge of the fridge too. They can tend to collect dust, dirt, and even mould if you don’t clean them regularly. With a little vinegar or soapy water, use a toothbrush to clean out all the nooks and crannies.

Step 6: Decide What to Keep and What to Toss

Let’s be honest here: There’s probably lots of stuff in your fridge it’s long past time to toss. Oh yeah, you’re really going to eat those month-old slices of pizza? Or how about those loose blueberries that have been wilting in the corner since Canada Day? Don’t kid yourself, it’s time to get serious about tossing your old food.

Check expiration dates on everything. No excuses for food past its prime: If you can’t cook it up safely, don’t keep it around! Have trash bags on hand for everything you’re getting rid of, and don’t be afraid to get rid of food you simply aren’t eating. Grandma’s lasagna might still be perfectly edible (medically speaking), but that doesn’t mean it needs to stay in your fridge untouched for another night.

Step 7: Put It All Back

Once you’ve dried out your fridge and shelves, put everything back inside. Many Whirlpool fridges have convenient shelves that can be moved and adjusted depending on how you like to organize your space.

Try out a new configuration that helps you stay organized better, or install a Lazy Susan to prevent condiments and leftovers from getting forgotten in corners. Make sure all your food is clearly labelled too, with stickers noting the date your leftovers were made, so you don’t have to wait ‘til next November to find out that your mashed potatoes have gone mouldy.

Once your Whirlpool is freshly cleaned and organized, you’ll be ready to take on the holidays – all thanks to Clean Out Your Fridge Day! And if your old fridge just isn’t doing the trick and you’re interested in upgrading to a Whirlpool, come by our store and talk to our associates. We’re happy to help you pick out a fridge with all the space you need, and storage solutions that will keep you from having to celebrate Clean Out Your Fridge Day again anytime soon.

Amanda, Your Appliance Expert

4 Questions to Ask Before Buying a Samsung Refrigerator

4 Questions to Ask Before Buying a Samsung Refrigerator

Your refrigerator plays a major role in your life. It keeps your food fresh and your drinks cool. Not to mention, it keeps your wallet fuller since you’re less likely to eat out at restaurants and more likely to utilize the food from your fridge.

When it’s time to get a new refrigerator for your home, and you can’t decide which refrigerator is right for you, taking the correct steps to get you the best one for your lifestyle is crucial. Asking the right questions can help make your refrigerator shopping process an easier journey. Whatever you decide, going with a fridge from Samsung is a great choice because it is both sophisticated and functional. Here are four important questions to consider before making a purchase on a refrigerator.

1. What is my budget?

Have you ever fallen in love with something in the store BEFORE reading the price on the label? Unless you’re lucky, this can be a recipe for disaster. Before getting your heart broken, it’s best to set a budget for yourself when on the search for a new appliance. If you are looking for a fridge that gets the job done, but need a simpler and less expensive model from Samsung, speak to one of our sales associates to see what’s in stock that can fit your budget.

2. What size do I need for my space?

The only way to know what size refrigerator you can have in your kitchen is by measuring either your current refrigerator or the space where you want to put it. There’s nothing more disappointing than buying the wrong-sized fridge, having it delivered, and then realizing as you try to push it in, it just won’t fit. Measuring will save you a big hassle in the long run.

Samsung Black Stainless Steel Kitchen

3. Which colour/finish will go best in my kitchen?

If you don’t have a preference as to what colour your Samsung refrigerator should be, you may be interested in getting one with a stainless steel finish. They are generally fingerprint resistant, easy to clean, and tend to go well with all appliances. We would highly recommend stopping in to our store to get a good look at them and see if stainless steel or another finish is right for you.

4. What features do I need?

Samsung has all kinds of features that can benefit you, but it’s up to you to only get what you need – especially if you’re on a budget. Maybe you like easy access to water, in which case you should be sure to get a Samsung fridge with water dispenser for ice and filtered water. If you want storage drawers that will preserve your fruits and vegetables precisely, a Samsung refrigerator has just the Advanced temperature control drawers for you. Find the features that mean a lot to you from Samsung and go with them.

When choosing a refrigerator, figure out the above steps before you decide on one. Getting a fridge is a huge commitment, so it’s important that your new Samsung fridge matches your style and home just right. Stop in or give our store a call today and we’ll help you find the Samsung fridge that works best for you!

Amanda, Your Appliance Expert

Habits of a Successful Napper

Habits of a Successful Napper

Babies and toddlers, do it. Cats and puppies, do it too! And because they do, they have lots of boundless energy that is very difficult to contain! What do they know that we don’t? Why do so many of us have such difficulty taking naps when our bodies need it most? And then, there are those of us who have this napping business down to an art-form.

Thanks to Edison inventing the light bulb, we can push our bodies beyond the exhaustion zone. When we do, our natural sleep rhythms are disrupted, and a vicious cycle begins. Naps are not reserved just for the rhythms of nature and change in seasons, but anytime our bodies and mind crave for everything to stop – even for just a few minutes.

Here are some tips on what habitual nappers do to get their bodies energized!

1) Schedule the time to turn off

When we are at the office, we can schedule a quick nap after lunch. We can find a spot where we can be alone for 15 minutes and set an alarm so that we don’t miss the afternoon meeting. While at home, we can recharge our energy from our long list of chores by taking a little snooze on our patio, or on our cat’s favourite couch to give us the lift we need. Napping with kids could be a fun activity by creating a blanket fort in the living room. Adding this to our phone scheduler will, at the very least, have us stop for a moment or two to take a breath.

2) Early afternoon is the best time

Beware of the need for naps coming late in the afternoon as this will surely disrupt our night sleep. Whether we are feeling it or not, our body will just want to stop moving. It’s best to skip the late nap altogether to avoid a poor quality of sleep later. Remember point number 2 above!

3) Don’t feel guilty

Many of us feel a pang of guilt when our eyes become heavy and our bodies crave to curl up on a couch, and it’s only 2pm. The fear of being judged as lazy can easily prevent us from listening to our own body. We should always listen to our body.

Habits of a Successful Napper (2)

4) Set a gentle alarm after 20 minutes

Naps are not intended to be hours long. We need to take lessons from cats to understand the art of napping. Short breaks can yield long bursts of energy and is what our goal should be. Setting a gentle alarm, and not a fire drill will ease us back to get on with our day. There is no need to shock us into wakefulness, our body will know when it’s had its fill.

5) Feel productive and accomplished

Although this may sound odd, taking breaks in our day will indeed improve productivity – more so than pushing through the fatigue to get to the end. Attempting to complete tasks when we are running on ‘empty’ only yields disorganized and substandard results. One thing we must remember is that there is always something to do.

When we find ourselves needing longer naps and not feeling rested afterwards it could be a sign of poor sleep quality. Seeing a professional if a sleep disorder is suspected is a good idea.

Make sure to visit our Inspiration blog for more sleep tips like 5 Habits Messing Up Your Sleep and many more Sleep useful articles.

Gerry, Your Sleep Expert