7 reasons to Love the Bosch 100 Series Dishwasher

7 reasons to Love the Bosch 100 Series Dishwasher (Large)

The Bosch 100 Series Dishwasher is the new baby in town among home appliances. The Bosch brand has always been at the forefront of making-life-easy for families around the world through its range of quality home appliances. The company is a leading force in providing dishwashers with premium quality to families for over a decade now.

From the look of things, it’s certain Bosch is keeping its legacy of enhancing customers’ lifestyle by introducing another home appliance blockbuster – the Bosch 100 Series dishwasher line. The product comes with a number of premium features, including the Bosch’s legendary sound reduction technology. This is really a great deal of value at an affordable price.

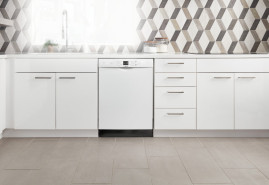
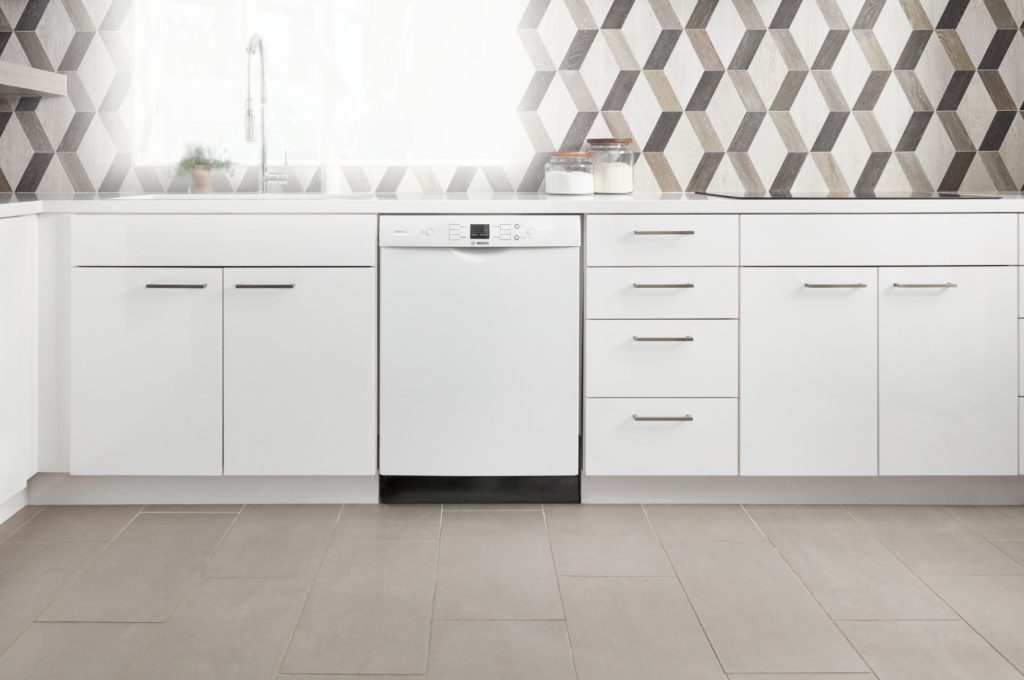
The Bosch 100 Series dishwasher line is loaded with lots of quality features. The Bosch brand is simply keeping to its tradition of helping families in their day to day lives. With its three distinct handle options, the new Bosch 100 Series dishwasher lineup comes in black, white and stainless steel finishes. The following are the additional features and benefits the new 100 Series dishwasher offer to ease household chores for families:

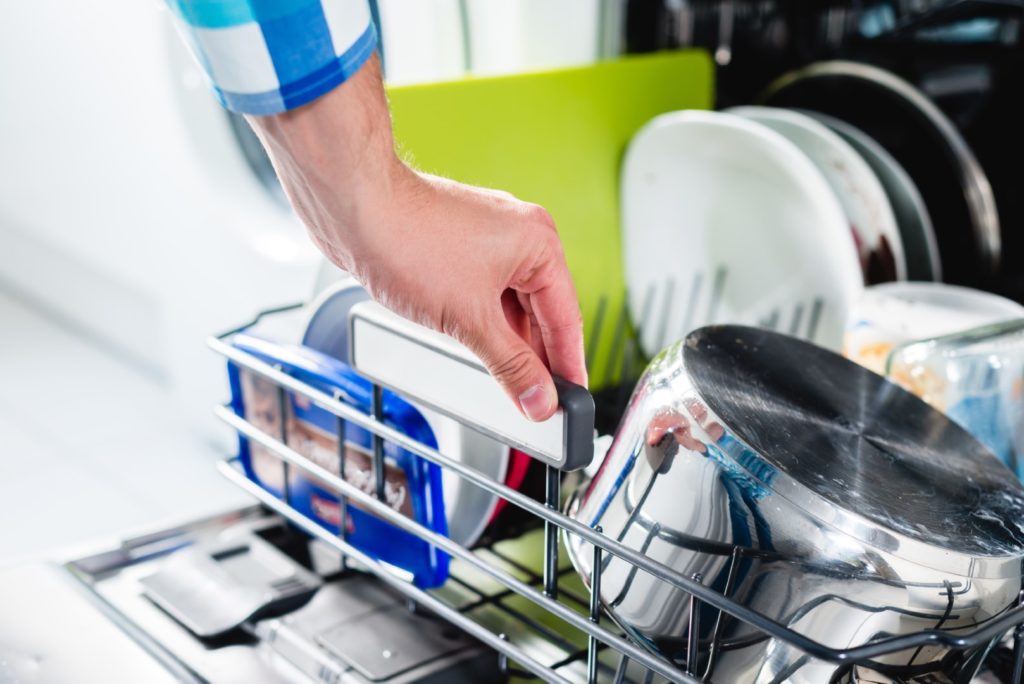
1) Utility Rack: The Bosch utility rack makes dishwashing less of a hassle. With a secure, designated spot for those ‘hard-to-place’ items, you surely have fewer things to worry about.

2) More Ease, Less Noise: Its 3-step mesh filter technology means no more noisy food disposal.

3) PrecisionWash™ System: This dishwasher comes with 5-point intelligent sensors that continually scan the progress of the cycle targeting every item of the load. Users don’t have to do anything, just start the dishwasher and walk away.

4) 24/7 Overflow Protection System: With 100 Series dishwasher, you never have to worry about leaks, even while it’s in the off mode. Every Bosch dishwasher must pass 485 stringent quality checks including a water test before leaving the factory.

Bosch 100Series Dishwasher in Stainless Steel

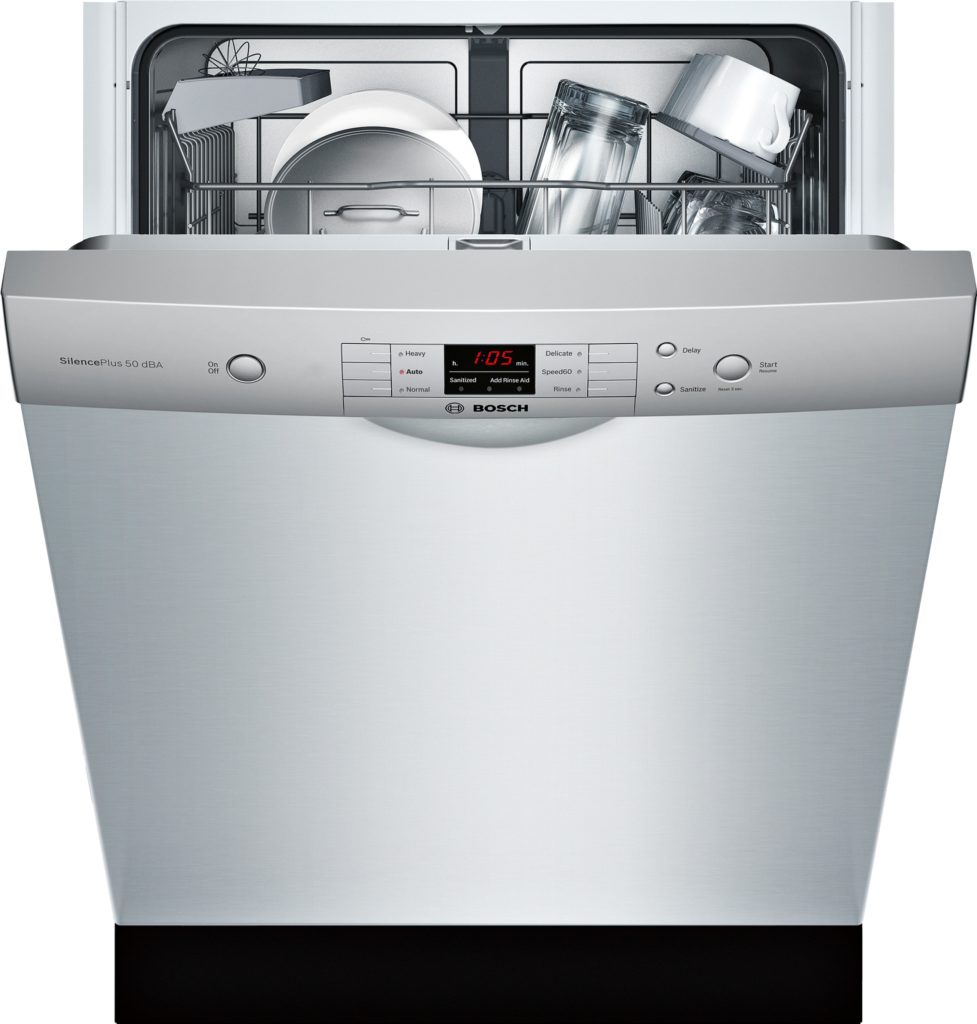
5) Fingerprint Resistant Stainless Steel: Bosch 100 Series dishwashers provide the ultimate exterior protection against fingerprints dirt and smudges. With this feature, your dishwasher will always look great.

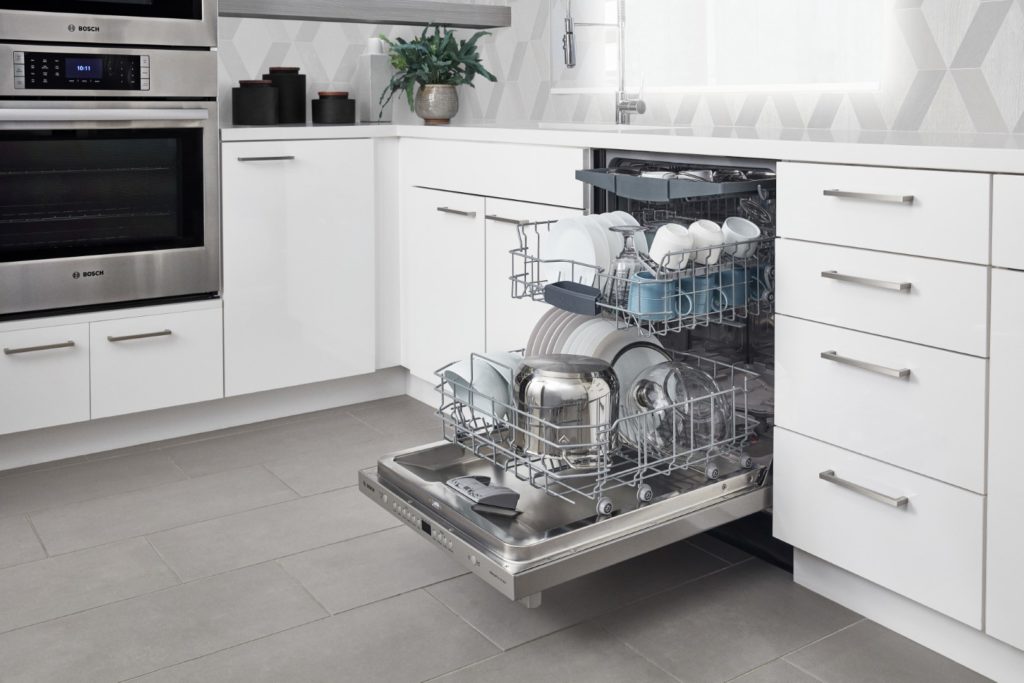
6) RackMatic™: The Bosch 100 Series dishwasher offers a 3rd level RackMatic™ adjustable height and up to nine rack positions to help families in the arrangement of every load. Items can be arranged according to their height in the dishwasher.

7) Rack Options: Since each household has different preferences for loading their dishwashers, the Bosch 100 Series dishwasher provides class-leading racks. These racks provide additional capacity and loading flexibility for families based on their preferences.

Bosch 100Series Dishwasher in Stainless Steel_Racks

With the introduction of this new 100 Series to its array of quality dishwashers, Bosch is definitely giving every household the power to choose convenience over a burden. With premium features ranging from its quiet operation to reliable performance and sleek design, the Bosch 100 Series is truly a must-have for kitchen cleanup.

Isabelle, Your Appliance Expert

Countdown of the 3 Best-Selling Whirlpool Laundry Pairs

3 Best Selling Whirlpool Laundry Pairs

“I hear good things about Whirlpool.” Time and time again, people choose Whirlpool washers and dryers and it’s not hard to figure out why. After one hundred years, Whirlpool gets it. Their appliances are consistently rated amongst the most reliable, the most capable, and the most value for money on the market.

Looking at Whirlpool’s 3 best-selling laundry pairs, we can see there’s a heavy focus on doing things better, but most importantly on doing them right. From time-saving features to more efficient cycles Whirlpool has made it easier to manage your laundry. You’ll save money, you’ll save energy, and most importantly you’ll save time.

Designed with you in mind, a Whirlpool washer and dryer are the perfect match for any family.

#3 – WTW8500DC Washer and YWED8500DC Dryer

WTW8500DC Washer and YWED8500DC Dryer

Starting our countdown of the best-selling Whirlpool laundry pairs, the high efficiency WTW8500DC top load washer and YWED8500DC dryer kick us off at number 3.

The Cabrio. Featuring Whirlpool’s patented Adaptive Wash technology with Active Bloom wash action, the extra large 6.1 cubic foot top load drum completely immerses clothes in a load specific mix of water and detergent guaranteeing better results with less wear on your clothes. Featuring 26 wash programs, including steam features and one of the quietest wash cycles on the market, the WTW8500DC doesn’t disappoint.

The YWED8500DC dryer brings the same attention to detail. With 23 cycles, including anti-wrinkle steam technology the 8.8 cubic capacity drum is one of the largest in its class. Boosting advanced moisture sensors and Whirlpool’s quiet dry system, it’s the perfect machine for any large family.

#2 – WFW85HEFC Washer and YWED85HEFC Dryer

WFW85HEFC Washer and YWED85HEFC Dryer

At number 2, Whirlpool ups their game with the 5.2 cubic foot front loading WFW85HEFC washer, and the 7.4 cubic foot YWED85HEFC dryer.

The WEW85HEFC washer offers Whirlpool’s Adaptive Wash technology with ColorLast cycle to keep clothes looking newer longer. Featuring 11 wash cycles, including a Quick Wash feature that cleans small, lightly soiled loads in no time at all. Though, what really shines here is the TumbleFresh option that periodically tumbles the load after the cycle is complete to prevent wrinkles and odours from setting in.

The YWED85HEFC dryer is no slouch either. With its Advanced Moisture technology, you’ll use less energy and prevent over drying. Steam Refresh with Whirlpool’s Wrinkle Shield option also ensures that your clothes don’t get twisted and wrinkled if it takes you a little longer to take the load out of the dryer.

And that brings us to…

#1 – WFW75HEFW Washer and YWED75HEFW Dryer

WFW75HEFW Washer and YWED75HEFW Dryer

Competitively priced with rave reviews across the board, Whirlpool knocked this pair out of the park. Coming in at 5.2 cubic feet, the extra large capacity WFW75HEFW front load washer can do up to three baskets of laundry in a single wash. With Whirlpool’s Adaptive Wash technology featuring 8 wash cycles and precision dispensers for detergents and softeners you can forget about the guesswork.

As you’d expect, the YWED75HEFW front load dryer picks up right where the WFW75HEFW leaves off. At 7.4 cubic feet capacity, the extra large drum can handle any load including King sized comforters and other bulky items. With advanced moisture sensing technology, the YWED75HEFW also offers an eco-boost feature to save energy and help the environment.

Easy to use. High Performance. Put it in, press start, and walk away.

Perfect laundry, every single time.

Isabelle, Your Appliances Expert

How to Clean Your Microfibre Furniture Sofa

How to Clean Your Microfibre Furniture Sofa

When shopping around for a new couch, Signature Design sofas by Ashley are where it’s at. Especially if you love nothing more than to sink into a couch and laze about, you’ll want a microfibre suede sofa to fulfill your inner couch potato.

While it’s a lovely addition to your family room, it won’t look that way for long if you never take the time to clean it. Dust and dirt will find your micro suede couch and it will do some considerable damage. In fact, micro suede is an intimidating fabric to clean, but if you know how to do it right, it’ll be much less scary. Keep your microfibre suede sofa fresh and clean for years to come by taking a couple minutes every month to wipe it down properly.

Suck It Up

Before gathering a ton of ingredients to make a cleaning solution, check the dust level of your couch. Chances are it only looks dirty, but really, it just needs a good dusting. If that’s the case, pull out the vacuum and get to work! Couches tend to absorb a lot of dust and dirt, so vacuuming your couch every once in a while is a nice way to make it look new again. If you just suck it up, you and your couch will be a lot happier.

Check the Instructions

It’s important to find out if the couch can actually handle liquids before you start spraying your cleaning concoction all over your couch. Some suede sofas can even be stained by water, so be sure to check the label underneath your Signature Design by Ashley couch cushions, just to be cautious.

What You Need

Luckily, it doesn’t take much to create a cleaning solution for your couch. Use these three ingredients and other items to help your sofa look and smell clean once again.

  • Water
  • Dish soap
  • White vinegar
  • Spray bottle
  • Towel
  • Suede eraser
  • Scrub brush

How to Clean Your Microfibre Furniture Sofa (2) (Large)

Mix the ingredients

Take a little bit of water, soap, and white vinegar and pour them into a spray bottle. A spray bottle is best so that your cleaning solution lightly covers a large area and doesn’t drench your couch. But if you don’t happen to have a spray bottle on hand, feel free to combine the ingredients in a bowl and dip a hand towel into the mixture instead. If you do have a spray bottle, go ahead and spray all over the couch, or just over the spot you want to clean. Use a towel to scrub the wet area in circular motions, which will ensure the dirt will get scrubbed off and will leave a pristine looking suede couch again. Your couch will probably look a bit darker than normal after spritzing it with water – but don’t worry! Once it dries, it will be back to its regular colour again.

Erase the Mess

For those of you who don’t find mixing natural ingredients enticing, a suede eraser would be a great and easy tool to use on your micro suede couch. It works just like an eraser and when rubbed on a dry stain will gently remove the unwanted marking. Be sure to use a scrub brush to wipe away the debris after you’re done with the suede eraser. For a quick cleanup, use this method of cleaning on smaller messes that have already dried up. Your Signature Design by Ashley will appreciate the love.

Alex, Your Furniture Expert

How to Keep Cool During the Summer Nights with a Tempur-Pedic Mattress

How to Keep Cool During the Summer Nights with a Tempur-Pedic Mattress (Large)

Learning to survive and sleep through the hot summer nights isn’t always as easy as you’d think. Especially if your air conditioner is having some technical difficulties, trying to sleep while sweating is incredibly uncomfortable. It takes a special combination of luck, skill, and determination to fall asleep in the excruciating heat, but with the right kind of bed, such as a Tempur-Pedic mattress, and a few simple tips to keep cool, you’ll fall asleep like a baby in no time. Follow these simple tricks to keep you chill while you nod off to dreamland.

Use Your Freezer for More Than Just Ice

If there’s one thing your Tempur-Pedic Mattress can’t stand, it’s being wet. If you happen to get particularly sweaty on hot evenings, it’s probably a good idea to invest in a mattress cover if you don’t already have one. An easy way to prevent the perspiration from pooling under you is by keeping yourself cool with a chilled washcloth. Take a regular washcloth, wet it completely under the faucet, and then let it freeze. After a couple hours, it will be icy and ready to cool you down. Place it on your feet or under the back of your neck for the best results. You could even stick your sheets, socks, and more in the freezer for about thirty minutes before bed to ensure you get that chilly sensation your overheated body has been craving.

Breathable Sheets Are Your Friend

It may be tempting to rip your bed sheets off of your Tempur-Pedic, but leaving them on is in your best interest. Your sheets can make a huge difference to your nighttime routine. Just like flannel sheets will keep you nice and toasty in winter, having breathable or moisture-wicking sheets will help regulate your body’s temperature. While there are plenty of sheets out there that can make your body feel like it isn’t trapped in a sauna, some especially cooling fabrics to keep an eye out for are cotton, eucalyptus, bamboo, and silk. These natural fibres will help hot sleepers stay cool throughout the night and into the morning.

Breathable Sheets for hot summer days (Large)

Check the Airflow

Having a proper airflow under your Tempur-Pedic mattress can be a big part in keeping your body cool. If your foam mattress lays flat on the floor or has a bed frame that sits on a solid platform, you may be constricting the airflow, leaving you to sizzle on your bed like a slice of bacon. Lift your Tempur-Pedic up on a slatted bed frame and start breathing in the fresh air.

Don’t Believe the Myth

When it comes to Tempur foam mattresses, most people are under the impression that these comfy beds are notorious for absorbing heat and driving people into a sweltering fever. This is a common misconception when it comes to Tempur-Pedic mattresses, but it isn’t always true. Plenty of Tempur-Pedic mattresses even have cooling gel technology integrated within them, producing a rather refreshing experience during the heat of the night.

Don’t melt away this summer – find a Tempur-Pedic mattress at our store that will chill you out while also providing you with a perfect night’s rest!

Angela, Your Sleep Expert

4 Ways to Wake Yourself Up When Your Beautyrest is Too Comfy

4 Ways to Wake Yourself Up When Your Beautyrest is Too Comfy (Large)

Do you ever find yourself pushing snooze just a few too many times in the morning? The struggle is real when it comes to opening your eyes after lying on a Beautyrest mattress for 8 hours in the night. Those first few moments when dreams turn to real-life is quite literally, a rude awakening. Sometimes when your alarm goes off though, it means business. It means you have to get up right then or you’re going to be late for that early bird meeting. Try out a few of the creative ideas below to help you get up and ready for the day without falling back into a stressful slumber.

1. Ease Up on That Caffeine Addiction

If there is one thing you can do to prevent yourself from sluggishly waking up, it’s going to bed at an early hour. If you drink caffeine too late in the day or just too much of it, there’s a chance your body may keep you up until an ungodly hour. Try limiting your coffee, or other caffeinated drinks, intake to only the minimal amount you need. Restraining your coffee consumption could be the key to helping you rest soundly, and arise with the morning sun, without feeling like a zombie.


2. Set the Right Tone

If you’re waking up every morning to the sound of a terribly obnoxious ringtone, that could be your problem right there. Is there anything worse than having your sleep interrupted by something you hate? A buzzing fly, a weird smell from the kitchen sink, and a bad ringtone are all on the same level as the worst ways to wake up. Try changing your alarm sounds to something you’d enjoy waking up to. Maybe use your favourite song or one that’s catchy enough to motivate you to get up and dance! Whatever it is, make sure you actually enjoy it, so you’ll love waking up every morning just to hear it. “Wake Me Up Before You Go-Go,” by Wham, anyone?

3. Make Exercising a Habit

Finding time to work out can be rather difficult for many people who hold 9-5 jobs. Some will try to go after work, but even that can get hard when you just want to sit back and relax after a long work day. Going to the gym first thing when you wake up is a fantastic way to spend your mornings and help you start them more productively. Once you do it enough, it’ll become a habit, and waking up at the same time will be a piece of cake for you.

Drinking water in the morning

4. Drink Water

This may sound too simple, but sometimes all it takes is drinking a glass of water to begin the waking up process for your brain. You’ll have to get out of bed, which automatically forces your body to get physical, and then drink a cold glass of water. The colder the water, the harder your body has to work to warm it during digestion – thus waking it up.

There are tons of ways to get your body and brain awake and ready to start the day, but if you have a bad mattress giving you sleepless nights, you may continue struggling to get out of bed. Rise and shine like a champ with the help of a Beautyrest mattress. You’ll sleep through the night and find your motivation and focus completely restored with Beautyrest technology.

Angela, Your Sleep Expert

6 Omelettes to Try with Your New KitchenAid Appliances

6 Omelettes to Try with Your New KitchenAid Appliances

There’s just something about breakfast food, and eggs in particular. We’re not sure why people don’t just eat breakfast food all the time, or why other food groups even exist. Not breakfast related? Psh. Get off our table and away from our plates.

Well, if you are like me and just can’t get enough of the scrumptious meals that normally start the day and are looking for some new recipes to test out with your new KitchenAid appliances, don’t worry. Here’s a list of some delicious omelette recipes, so you can try out different twists on a breakfast staple every meal of the day if you want. Yes, even for dessert! Get ready, because it’s time to chow down, omelette style. Nom nom nom.

1. Dr. Seuss’s Magical Surprise

Let’s kick off this list with a little visit to two famous S’s…a little doctor named Seuss and another name you are sure to know: Martha Stewart. What do they both have in common? This Green Eggs and Ham Omelette.

Green Eggs and Ham Omelette

Not only does the omelette include some other healthy staples – like spinach – it boasts a unique green colour that will catch the eyes of even the pickiest of children…or adults. Whip up a few on your KitchenAid range and you’ll see why yourself / or else you’ll end up like an Elf on a Shelf. OK, we’ll leave the rhyming to the Dr., but you’ll want to check this recipe out regardless.

2. Will Smith’s Favourite

Ready to try an omelette that’s a little on the wild, wild West side of things? Yeah, I thought so. This aptly titled Western Omelette only takes a half hour in total to put together, which means you’ll be able to lasso up food for you and the rest of your family faster than a cowboy gallops into the sunset after a hard day of escaping from the sheriff and wrestling with outlaws.

Western Omelette

Warm up your KitchenAid cooktop, add some green and red bell peppers, ham, and scallions, and take a bite out of this vegetable infused omelette great for any time of the day. Yippee Ki-Yay!

3. Masala-mazing

Looking for something with some flavour, spice, and a little bit of punch? This omelette offers all that and more: check out this Indian Masala Omelette recipe. Not every omelette is going to require red chili powder, cilantro leaves, yellow onion, and some chopped tomatoes, but this Masala inspired dish incorporates all of the above into an omelette you are sure to remember. Whoever said breakfast food was boring was so, so wrong. So very wrong, indeed.

Indian Masala Omelette

4. Why Did the Omelette Cross the Road?

To get to your KitchenAid range on the other side, of course. This dish combines the beginning and end stages of a chicken’s life, throwing in some chicken along with the eggs — as well as apples — to form this Chicken Apple Egg White Omelette. It also pulls in some collard leaves and hazelnuts, giving you a good variety of food groups all in one recipe. Don’t tell the kids it’s healthy, and they’ll eat it right up.

Chicken Apple Egg White Omelette

5. More Kimchi, please

Looking for another unusual omelette? Perhaps you cook eggs often and need more ideas to test out with your KitchenAid appliances? Fine, fine, we still have other recipes for you. How about this Kimchi Omelette?

kimchi-omelet-recipe

Made with kimchi – duh! – as well as mirin, zucchini, green onion, oil, and pepper, this omelette offers an unexpected twist on an old favourite. It only takes ten minutes, so that’s plenty of time to spend on a bold and new approach to your favourite breakfast food.

6. Breakfast Dessert for…Dinner

Just because it might be typically a breakfast food, that doesn’t mean that omelettes also can’t have some dessert flair to them. I mean, it’s a scientific fact that whip cream tastes good on everything. Everything.

We’ve already included a savoury apple omelette on our list, but how about something a little sweeter? This way, we’ve covered all the bases. Perfect. Let’s take a look.

This cinnamon apple omelette includes apples, sour cream, regular cream, brown sugar, and cinnamon. Give it a try for any meal and see what it is like to have the worlds of breakfast and dessert collide. It’s sure to be a delicious result.

Amanda, Your Appliance Expert

5 Fresh Appliance Colours to Help Create a Theme Your Kitchen

Black Stainless Steel Kitchen from Whirlpool

Bland and boring kitchen designs are so yesterday. Who wants to sit down and eat somewhere that doesn’t also look great? No matter what you are eating – caviar, casserole, or cookies – preparing it in a well-designed kitchen is always going to improve the experience.

Sure, it might not totally make your poutine taste better, but it certainly will help the ambiance of your kitchen to throw in some new colours and thematic parings. And while you may think that your kitchen appliance colour choices are limited, think again. Let’s take a look at the world of colour that awaits.

1. Take the Black

(See image above)

Sometimes the best choice is to paint the night, or your kitchen appliances, black. Whirlpool’s new Fingerprint Resistant Black Stainless Steel offerings mean you can freshen up your entire suite of kitchen appliances in one unified, matching nighttime style.

With ranges, ovens, refrigerators, and dishwashers, every piece of your kitchen ensemble can join the dark side. And, like the name says, you won’t have to worry about fingerprints getting in the way of enjoying your shiny new appliances. It’s a victory for lovers of darkness everywhere. Huzzah!

2. The Sunny Side of the Street

Whirlpool Sunset Bronze Kitchen

For those of you who want your kitchen to have a somewhat sunnier demeanour, fret not. How about something that captures the moment right as the day ends and you come home, ready to jump into the kitchen and whip up a masterpiece? The sunset peeks through your windows and the light falls on your brand new…wait for it…sunset coloured appliances? Yup. You read that right. Sunset coloured.

Enter the new Whirlpool Sunset Bronze and Fingerprint Resistant Sunset Bronze colour, which combines super-hip rose gold undertones and sunset bronze to bring any kitchen into a modern – and bright – age. The Bronze Age may have come and gone, but this new tonal colour is here to stay.

3. Pretty Fly for a White Sty…le

Whirlpool White Kitchen

While some may say that white is the absence of colour, it actually represents an abundance of class. Sleek and stylistic, white appliances can perfectly capture that clean and modern atmosphere without cluttering up your kitchen with distracting hues and tones.

Even better, white appliances not only look great but also open a whole new world of possibilities for decorating and exploring with themes in the rest of your kitchen. The world is your oyster, and your brand new white appliances are the shiny white pearl at the centre.

4. Steel Their Breath Away

Whirlpool Stainless Steel Kitchen

Bold. Beautiful. Stoic. Surprising. Steel. Yes, it may be used for bridges, but a Fingerprint Resistant Stainless Steel finish on your Whirlpool appliances makes a statement that even the pickiest of house guests will be sure to notice.

Better yet, the Fingerprint Resistant finish means that all those messy and grubby little kid fingers won’t leave marks on your new appliances, and you’ll be able to go on enjoying their sheen for years and years to come.

5. Heavy Metal

Sometimes metalheads do get it right: Metal really can rock and roll, and it can also look good in your kitchen. Who knew?

For example, new appliances can look awesome in a nice Fingerprint Resistant Metallic Steel finish, like on a brand-new Whirlpool refrigerator.

Just make sure to leave time in your cooking schedule to stop and adore its metallic gleaming. Ah, yes. That’s the shine and sparkle you were looking for. Nice. Metal for the win.

Amanda, Your Appliances Expert

How to Clean 5 Tough Stains in a Snap with a Samsung Washer

How to treat grass stains

Mysterious clothing stains are just a part of everyday life when you’re doing laundry for a whole family, but they don’t have to be part of your everyday wardrobe. Samsung laundry machines have a wide range of features that let you take out tough stains in no time. So, be prepared next time disaster strikes, and learn how to clean these 5 common household stains in your Samsung washer.

1. Grass Stains

Good news: your little one nabbed the winning home run at their Little League game! Bad news: you’re the one who has to clean the uniform. Whether grassy knees are courtesy of an athletic kid, afternoon yardwork, or an unfortunate fall during what was supposed to be a nice jog in the park, unsightly green stains will be a thing of the past with Samsung.

Before starting a cycle, just pretreat the offending clothes using cool water, stain remover, and Samsung’s ActiveWash built-in sink. Grass stains don’t stand a chance against a good soak followed by a cold wash cycle.

2. Coffee Stains

Coffee is another unavoidable stain for a family on the go. Early call times for work, school, and soccer practice require a good old-fashioned cup o’ joe, but your morning pick me up can also bring your day crashing to a halt if it finds its way onto your pants and shirt.

Like grass stains, coffee stains fade fastest when soaked first with cold water using your Samsung’s built-in sink, but unlike grass stains, you’ll want to follow up the presoak with a cycle using the hottest water you can get. Samsung washers have super customizable temperature options, so just throw the clothes in the washer, select “Extra Hot,” and let your Samsung wash all your worries away.

3. Pet Stains

You might take good care of your fuzzy friends, but that won’t stop them from repaying you by doing their, uh…business whenever and wherever the need strikes. Whether it’s fur, slobber, odours, or more unsavoury stains, Samsung has you covered.

Brush off any solids, then run the fabric under cold water. Heavy stains might require an overnight soak in vinegar or bleach, but lighter stains can usually be taken care of by throwing some apple cider vinegar in with your usual wash cycle. When you’re done pre-treating your clothes, set your washer to Allergen (to wash away deep dander and bacteria) or Sanitize (to get your clothes looking and smelling good as new).

How to Clean 5 Tough Stains in a Snap with a Samsung Washer (2)

4. Juice Stains

What do you do if your kid spills fruit juice on their favourite toy? You know, the one they can’t sleep without? Fifteen minutes before bedtime? Don’t worry, you don’t have to pick between a sleepless night while teddy presoaks in the washer and a sticky toy attracting ants to your kid’s room—use Samsung’s Deep Steam setting instead. Steaming is a surefire way to get out the toughest of stains—no prewash required! Just throw Mr. Bear into the wash, set it to steam, and he’ll come out squeaky clean in no time.

5. Grease Stains

Whether you’ve been working hard over the stove or you’re just grabbing a quick bite to eat, grease stains can sneak up on you. It doesn’t take much for a small splash or drip to turn into a stubborn stain on your spotless clothes. But don’t worry, there is a reliable way to get rid of these pesky spots, and it’s simpler than you might imagine.

The key to cutting grease stains is just a bit of dish detergent! Blot away any remaining grease with cloth and cover the whole spot with dish detergent. With a scrub brush and a bit of elbow grease (no pun intended), you should be able to lift off the worst of the stain, then just toss your clothes in the wash for a final clean. Samsung’s normal wash cycle—set to warm, but not too hot—should have just the right combination of power and care to get your clothes fresh again without setting the stain in deeper.

Amanda, Your Appliance Expert

5 Unique Kitchen Items You Won’t Believe Are Safe for Your GE Dishwasher

5 Unique Kitchen Items You Won’t Believe Are Safe for Your GE Dishwasher

You just bought a brand-new GE Dishwasher, and you want to test it out. Run it through the wringer. Throw everything you can think of – cake crumb-coated plates, burrito crusted dishes, ice cream stained bowls – at it just to see how powerful it is.

Of course, there are some things that you shouldn’t put in your dishwasher – like raccoons — but there are also some surprising things that you might not know are dishwasher safe. So, try throwing the below items in your new washer, and sit back and relax and see the sparkling clean results.

1. Egg Beaters

There are some dinnerware items that you often use but are a total pain to wash by hand. Egg beaters? Those rise right to the top of the list. They may be super helpful in making fluffy and amazing scrambled eggs, but those little wiry nooks and crannies are the absolute worst when it comes to cleaning.

Ta-Da! Problem solved. Grab your egg beaters – or whatever whisk you fancy – and throw them in your egg-cellent new dishwasher. Problem solved: GE’s Deep Clean Silverware Jets will blast that food into outer space…or at least off your beaters. Bet that will pass even your greatest eggs-pectations.

2. Wine Stoppers

Somewhat of a misnomer, wine stoppers aren’t there to get you to drink less wine, but just to keep the wine that you do have fresh after popping the cork. They serve a good purpose!

And as such, they should be treated with care. They can – from time to time – get a little wine splashed on them, and everybody knows that wine can stain and be a total pain to wash off. But, stop worrying too much: Many wine stoppers can be thrown right into the dishwasher. In fact, you could even throw it in the dishwasher, grab a glass of wine, wait for it to come clean, and then “recork” the bottle. Now that’s some smart time and wine management, right there.

Mexican meal with tacos

3. Taco Holder

Whether you celebrate Taco Tuesday or Taco Thursday, or just love enjoying tacos every day of the week, taco holders can make prepping them so much easier.

But what happens when you go a little too crazy with your loaded toppings, and your once clean taco holder is now covered with burnt quesadilla cheese and blackened, hard-to-clean jalapeno residue? It would be a shame to throw our such useful and important culinary items.

Dishwasher to the rescue! Toss those taco holders in your GE dishwasher with its more than 140 Cleaning Jets and let your new home appliance do the hard work for you. It leaves you more time for taco eating, and anything that does that is a win in our book.

4. Panini Maker (Trays, at least)

While bread may be good in its normal, untoasted form, there’s just something about taking two slices, placing your favourite toppings, meat, and cheeses between them, and throwing them on a panini press for a little slice of warm, toasted heaven.

The problem is that paninis – just by their nature – can get messy, and cheese that tastes quite good can be quite annoying to try to scrape off the panini trays.

Good news! Stop the panini presses! Remove those trays and interior grids and throw (not literally throw, but you get the idea) them in your GE dishwasher’s convenient Third Rack and fret no more. Now, just make sure you don’t put the ENTIRE panini maker in the dishwasher, but we shouldn’t have to remind you of that.

5. Whiskey Stones

Some people want their whiskey cool, but without water dulling the flavour. For those brave souls, whiskey stones were invented. But like anything that sits and soaks in a glass, eventually, you are going to need to wash them. Yes, even if you are soaking them in alcohol. That doesn’t count as cleaning. Sorry.

But, whiskey stones are small, and there can be a lot of them. The tiny little things can also fall down the drain, and that’s just an accident waiting to happen.

Perfect solution and it didn’t even require a drink to think of it: Put them in the dishwasher. Yup, whiskey stones are dishwasher safe, and you’ll be able to keep them fresh and clean for that next nightcap.

Amanda, Your Appliance Expert

How to Grow an Indoor Herb Garden

How to Grow an Indoor Herb Garden

There’s nothing more satisfying or more delicious than home cooking, but sometimes getting a recipe just right can be a real challenge. Most of the time, the secret to that perfect meal is all in the ingredients.

Whether you’re trying to do justice by grandma’s old recipe book or encouraging picky eaters to chow down with a concoction of your own, fresh herbs add a special, irresistible something to any dish. Not only are homegrown herbs healthy and delicious, they can also help purify your air and make your home feel cozier!

So, give your home cooking an extra kick and transform your kitchen into a personal herb garden using these tasty tricks.

Chill Out

We all know that most plants thrive in warm weather, but it’s a well-kept gardening secret that some seeds actually grow better when left in the cold. Not every plant needs a cold start, so be sure to read up on the needs of your herb of choice, but some, like lavender and rosemary, tend to grow best when chilled for a few weeks before planting.

Now, you could just leave your seeds outside during the winter for this process—leaving them susceptible to blizzards and hungry birds—or you could store them safely in your Danby fridge or freezer. Danby’s compact fridges and standalone freezers are perfect for keeping your seeds at the ideal germination temperature without getting lost in drawers full of snacks or falling prey to high humidity and mould.

Shine On

Of course, sunlight is crucial for maintaining a thriving garden. Maybe you have plenty of natural light in your kitchen, and a big, sunny windowsill is more than enough to keep your garden going. If so, great! But if you’re not so lucky in your living space, or you hail from a colder, gloomier climate, your plants might need an extra boost of sunshine.

Danby offers several home herb growers that keep plants in perfect growing conditions. Fans keep air circulating and fresh, and digitally timed LEDs mimic natural sunlight even on the cloudiest of days. You can monitor humidity and light levels and keep your garden protected from bugs and disease, as well as from tiny hands (or paws) set on undoing all your hard work. But, if all the bells and whistles aren’t for you, you can still help your plants keep their sunny disposition with a small LED or fluorescent bulb.

Danby Herb Grower

A Rocky Start

There’s no universal rule when it comes to herb care—each herb’s needs are as different as their flavours! Some herbs, like thyme, oregano, and sage, prefer lower light and rockier soils. Dry conditions and poor soil quality actually bring out the richest flavours and aromas in these culinary staples—who would have thought? On the flip side, basil, cilantro, and some mint varieties tend to flourish in rich soil and plenty of water, so make sure to tailor your care to the needs of each plant.

In most cases, it’s a good idea to let the soil become dry to the touch between waterings to prevent roots from moulding, and be sure to water deeply every few days. Be careful to strike a good balance with your water schedule: overwatering can cause your herbs to lose flavour, but underwatering can cause the plants to become stunted or flower too soon, which also ruins the flavour of the leaves.

A New Leaf

Don’t be afraid to go wild harvesting those delicious leaves once your plant is fully grown—regular pruning is actually good for herbs’ growth, as it helps them focus their energy on making new leaves instead of maintaining old ones. As long as you leave enough large leaves for your plant to absorb sunlight, both your family and your flora will thank you for harvesting regularly.

But once you’ve picked your herbs, how do you keep them for future use? Some people invest in fancy dehydrators, but all you really need is an oven or range. Just spread your fresh herbs out on a baking sheet and leave them in the oven for 2 to 4 hours at low heat.

The style and simplicity of a Danby range is perfect for this step, not to mention it’s the perfect size to dry your herbs without wasting time or electricity. Now you have perfectly preserved herbs ready to be sprinkled over salmon or tossed over tofu anytime, but be sure to save some to serve fresh!

Amanda, Your Appliance Expert